
Loops
In Rhythmo Bande dubbing, a session is organised in loops (the French "boucle"): short stretches of the film, typically a handful of lines involving one to four characters, that are rehearsed and recorded as one pass. Netflix's TTAL format carries these loops alongside the dialogue events, so a delivered script already defines how the recording session is expected to be broken up.
Cue Pro shows these loops on a dedicated LOOPS track, reads them from and writes them to TTAL files, and allows loops to be created and edited directly in the project. Each loop has an ID, a start point, an optional end point and a colour. Loops are a navigation and organisation aid: they never change how ADR Cues are displayed, recorded or exported.
A loop is either ranged or open ended. A ranged loop has its own start and end point. An open ended loop only has a start point and runs until the next loop begins. A TTAL file may contain either kind, and both kinds can be mixed on the same track.
Note: The LOOPS track is available in Cue Pro only.
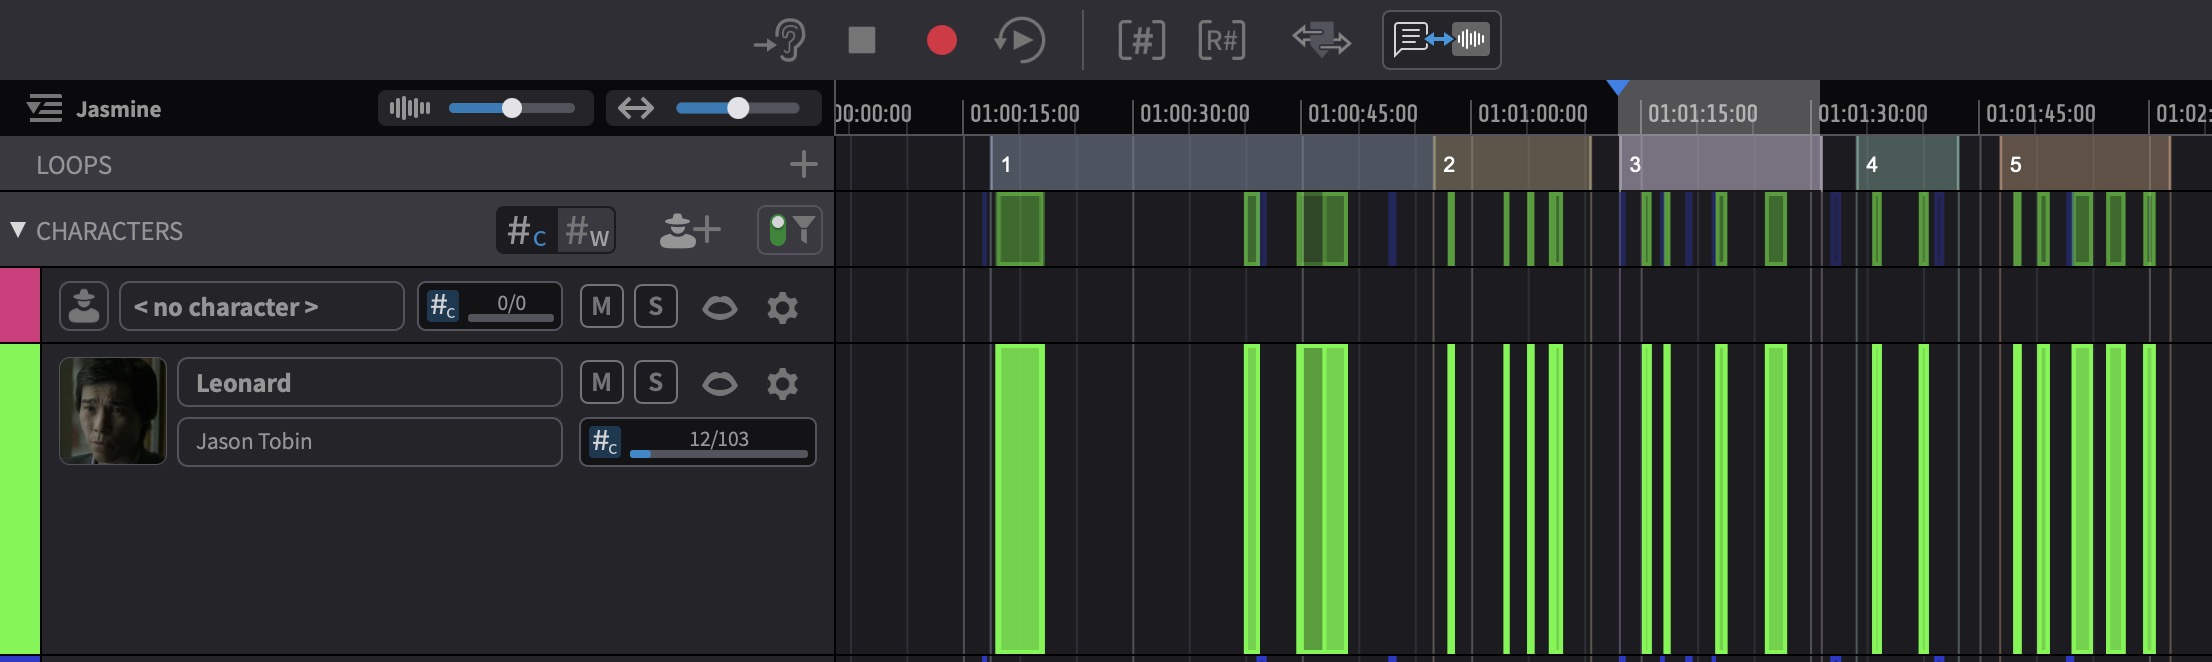
Showing and Hiding the Loop Track
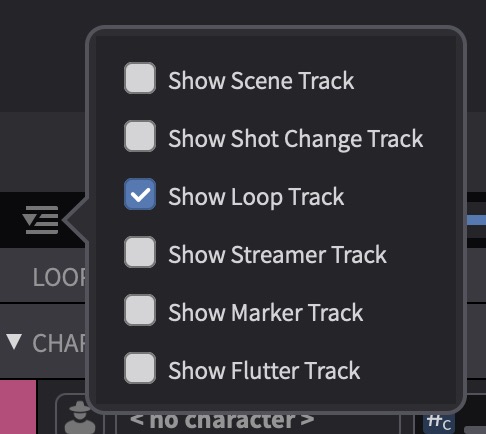
The LOOPS track can be shown or hidden using the track visibility pull-down at the top left of the Ruler Track section. Click the pull-down and enable or disable the Show Loop Track toggle. When enabled, the LOOPS track appears in the Ruler Track section alongside the SCENES, SHOT CHANGES, STREAMERS, MARKERS and FLUTTERS tracks.
Each loop is drawn as a coloured range with its ID. A ranged loop is drawn from its start to its end point; an open ended loop is drawn from its start to the start of the following loop. Loop start points also draw faint vertical lines across the other Visual Events tracks, so loop boundaries remain visible while working on ADR Cues. As with the SCENES track, these lines follow the track visibility and disappear when the LOOPS track is hidden.
The visibility state is saved per timeline. Importing loops from a TTAL file shows the track automatically.
Importing Loops from a TTAL File
Loops are read as part of the normal TTAL import (see the How to use TTAL with Cue Pro chapter). When the imported file contains loops, they are added to the LOOPS track together with the dialogue events, and the track is shown if it was hidden.
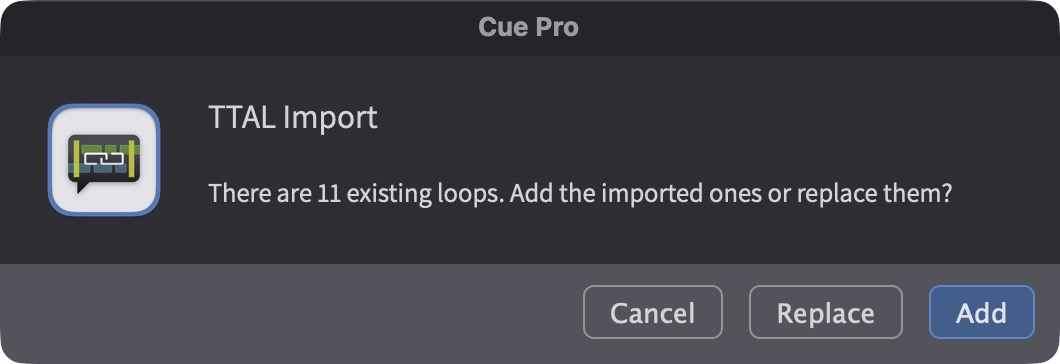
If the timeline already contains loops, Cue Pro asks whether to add the imported loops to the existing ones or replace them. Adding is the right choice when a second TTAL file covers a different part of the programme; replacing is the right choice when an updated version of the same script is imported.
Loops in a TTAL file may or may not carry an ID. Loops without an ID are assigned the next free number on import so that every loop can be addressed by ID in the Go To window. Any offset applied during the import (for example to align the file to the timeline start) is applied to the loops as well.
Creating Loops Manually
To add a loop, position the playhead where the loop should start and press L, or click the + button on the LOOPS track header. The new loop is created at the playhead with the next free ID and the next colour from the loop palette. If a timeline selection exists when the loop is created, the loop is ranged - its start and end points match the selection. If there is no selection, the loop is open ended. The end point, ID and colour can then be changed in the loop's properties.
To delete a loop, select it and press Backspace.
Editing Loop Properties
Double-clicking a loop on the LOOPS track opens its properties. The same set of fields is presented in both app modes; only the container differs:
- In Pro Tools Integrated Mode, double-clicking a loop opens the Edit Event window with the loop fields.
- In Media Mode, double-clicking a loop brings the Properties tab to the forefront with the loop fields ready to edit.
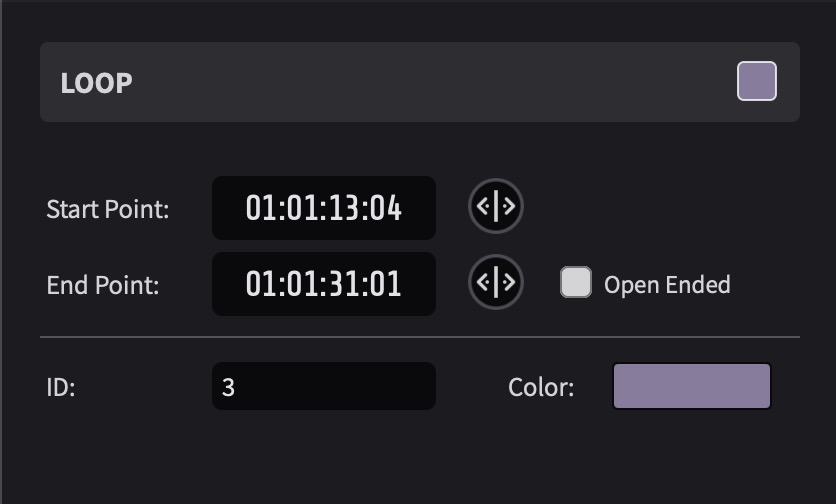
Start Point - the timecode (or feet and frames) where the loop begins. The start point can also be changed by dragging the loop on the LOOPS track: hover over the loop until the cursor switches to the grabber/hand tool, then drag it to its new position.
End Point and Open Ended - when Open Ended is enabled, the loop has no end point of its own, the End Point field shows dashes and the loop runs until the next loop starts. Disable Open Ended to give the loop its own end point; the field is pre-filled with a five second range which can then be edited. A loop's end point must lie after its start point.
ID - the loop identifier written to and read from TTAL. IDs are free text, so the numbering scheme of the delivered script can be kept as it is. Loops created in Cue Pro are numbered automatically.
Color - a per-loop colour used on the LOOPS track and in the Go To window. New loops cycle through a palette of muted tones that is distinct from the scene colours. Click the colour swatch to choose a different colour.
Navigating with Loops
Clicking a loop on the LOOPS track locates the playhead to the loop's start point and selects the loop's range on the timeline: for a ranged loop up to its end point, for an open ended loop up to the start of the next loop. The selection is mirrored to Pro Tools® in Pro Tools Integrated Mode, so the loop can be played, looped or recorded from either application.
Press Command & Option & → to jump to the next loop and Command & Option & ← to jump to the previous loop. Both commands locate to the loop's start point and select its range in the same way as clicking the loop.
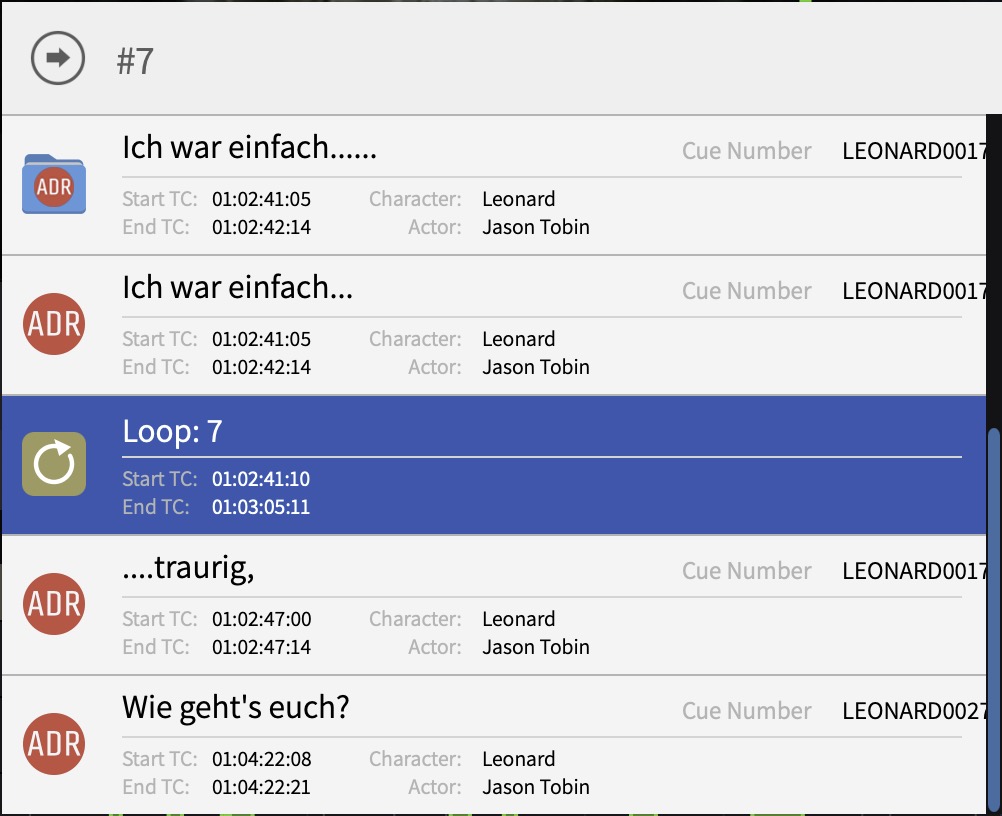
Loops can also be reached from the Go To window
(Command & G). Type
# followed by a loop ID to list matching loops
above any ADR Cues whose cue number matches the same text. Loops
are shown with their colour, ID, start point and end point (the
end point of an open ended loop is the start of the following
loop). Choosing a loop from the list locates to it and selects
its range, exactly like clicking it on the track.
Note: Loop navigation only moves the playhead and the timeline selection. It does not change which ADR Cues are selected. To record a loop, see the next section.
Exporting Loops to TTAL
Loops are written to every TTAL export of the timeline (see TTAL File Export in the How to use TTAL with Cue Pro chapter). Each loop is exported with its ID and start point; ranged loops also carry their end point. The timeline start offset used for the dialogue events is applied to the loops as well, so a file that was imported and exported again keeps its loop positions.
Loops are not included in the PDF, Word, CSV and Excel cue sheet formats.
Recording a Loop in Batch Mode without a Selected ADR Cue
Available in: Cue Pro Studio
In Batch Event Record Mode, a Rehearse, Record or Review pass no longer requires a selected ADR Cue. A timeline range is enough. This is what makes loop-based recording practical: click a loop (or jump to it with the Go To window or the next/previous loop commands) and press Record or Command & F3. The pass runs over the selected timeline range, stops at its end, and every ADR Cue the pass rolled through is marked as Done and has its take count incremented, whether it was selected or not.
The range does not have to come from a loop. Any timeline selection drawn in Timeline Range Mode works the same way, so an arbitrary stretch of the programme can be rehearsed, recorded or reviewed without first creating an ADR Cue or a loop for it. Without a timeline selection, the pass starts at the playhead and runs until the Stop button is pressed, like any other Batch pass. Pre-Roll and Post-Roll apply as usual, and the scrolling text shows every ADR Cue encountered.
A pass started from a range differs from a pass started with a selected ADR Cue in three ways:
- No track naming. The record track keeps whatever name it currently has in Pro Tools®. Configure the track name in Pro Tools® beforehand, or let Pro Tools® handle take numbering as described in the Track Naming section of the ADR Recording with Cue Pro and Pro Tools chapter.
- No DAW track automation. Cue Pro does not change the state of any Pro Tools® track. Nothing is record enabled, switched to input, muted or soloed by Cue Pro, and the Before, During, After and Stop states of the assigned Track Types are not applied.
- The record track must already be armed. Record enable the track (or tracks) to record onto in Pro Tools® before starting the pass. If no track is record enabled, Cue Pro shows the warning No track is record enabled and the pass does not start. Rehearse and Review passes do not perform this check.
Everything else behaves as in a normal pass: the mode overlay, countdown or scrolling text, the Pro Tools® selection with Pre-Roll and Post-Roll, and the GPIO messages. The pass start, In Point and Out Point messages are sent at the start of the range and at its end, and the stop message when the pass is stopped. For a pass without a timeline selection there is no Out Point, so only the stop message follows the In Point message.
In Single and Single w/ open end Event Record Mode, a selected ADR Cue is still required. Starting a pass without one shows the warning No ADR Cue Selected instead of silently doing nothing.
The Rehearse, Record and Review buttons in the Controller Bar and in the Event List header remain active in Batch mode even when no ADR Cue is selected. In the Single modes they are only active with a selection, as before. The same applies to the keyboard shortcuts and to hardware controllers such as the Elgato Stream Deck, which trigger the same commands.