Scene Track
The SCENES track provides scene number and description data for all ADR Cues in a project. With both scene number and description available in the Event List, Properties panel, and on exported cue sheets, the right cues can be located and discussed quickly when a director or supervisor refers to a scene by description ("the exterior at the house") rather than by number.
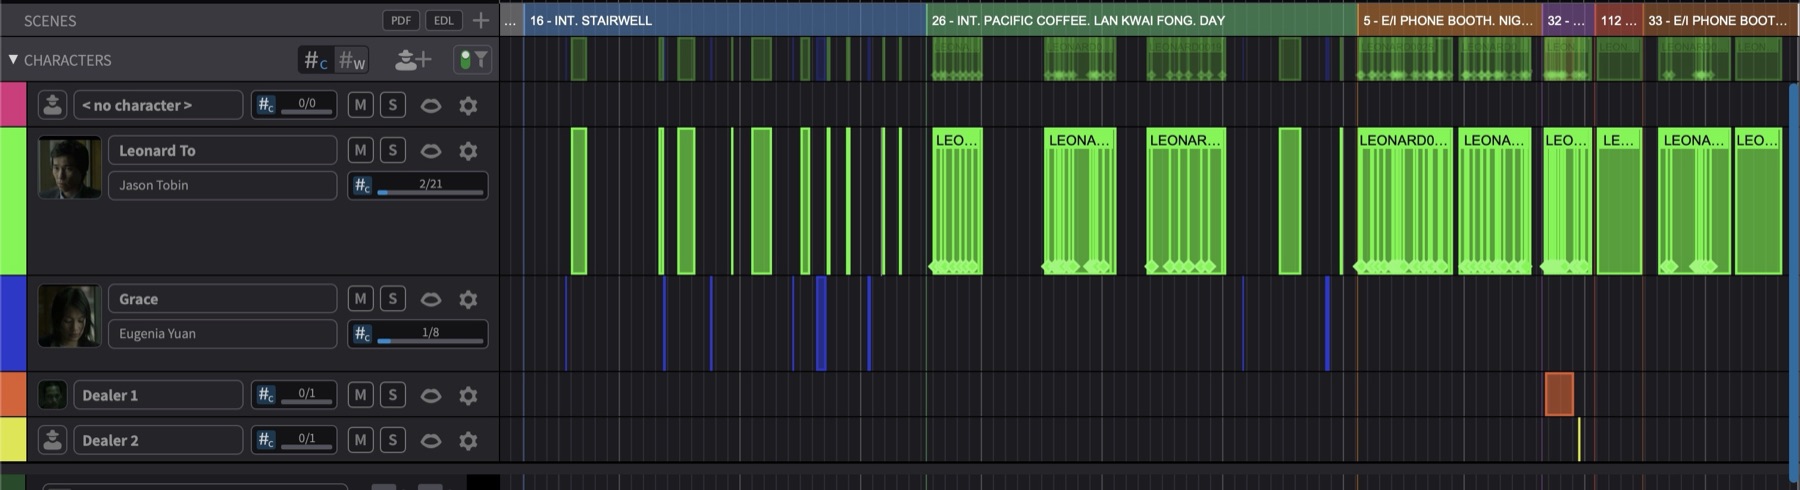
The SCENES track is a dedicated track in the Visual Events section. Each entry on the track defines a scene start point with a scene number, scene description, and colour. ADR Cues are automatically assigned to the scene whose start point falls immediately before the cue's start timecode - this assignment is determined entirely by position and cannot be set manually.
Scene entries draw faint vertical lines across all other Visual Events tracks to indicate scene boundaries. These lines are tied to the track visibility: when the SCENES track is hidden, both the track itself and the scene boundary lines across other tracks are hidden.
However, the underlying scene information remains linked to ADR Cues even when the SCENES track is hidden, so the Scene column in the Event List and scene separator bars on exported cue sheets continue to reflect each cue's scene assignment.
 {width=100%}
Populating the SCENES Track
The SCENES track can be populated from external sources or built manually. The most common workflow is to import scene data from a CMX3600 EDL, then supplement it with descriptions from a shooting script PDF.
Requesting an EDL from the Video Editing Department
The EDL must be exported from the NLE with specific settings for the import to work correctly. The text below can be copied and sent directly to the video editor when requesting the EDL:
Please export an EDL with the following settings:
- Format: CMX3600
- Tracks: Video only - no audio tracks, effects layers, subtitles, or other non-picture elements. Ideally just the actual footage tracks (V1, or V1 and V2 if applicable), so the EDL reflects real editorial cuts rather than compositing or graphics layers.
- Comments: Enabled, containing scene and take information only. Please do not include other comment types (such as effects names or plugin data), as these can cause issues.
Scene and take information is read from the comments lines - without these, the import has no scene data to extract.
Importing from a CMX3600 EDL
To import scene data from an EDL, use the EDL import function on the SCENES track. Multiple EDL files can be selected and imported at once. The import extracts scene numbers and timecode positions from the EDL comments and creates corresponding entries on the SCENES track.
 {width=50%}
Importing Descriptions from a Shooting Script PDF
After importing scene numbers from an EDL, descriptions can be added by importing a shooting script PDF. The PDF parser extracts scene descriptions and matches them to the existing scene entries on the track, filling in the descriptive text (for example, "INT. LIVING ROOM - NIGHT").
Adding Scene Entries Manually
Scene entries can also be created and edited directly on the track. To add a new scene entry, position the playhead at the desired scene start point and click the + button on the SCENES track header (next to the PDF and EDL buttons). The new entry is created at the playhead position. The scene number, description, and colour can then be set in the entry's properties.
Note: When adding scene entries manually, the default scene number is assigned in the order of creation - it does not reflect the entry's position on the timeline or any other ordering. The scene number can be edited afterwards in the entry's properties.
Editing Scene Entry Properties
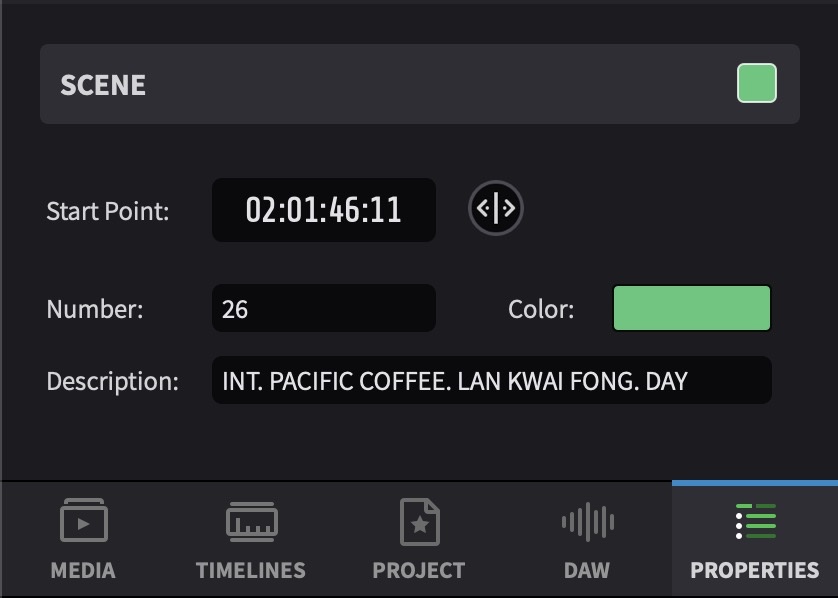
All three scene entry fields - Scene Number, Scene Description, and Colour - are fully editable from the same properties UI. The same set of fields is presented in both app modes; only the container differs:
- In Media Mode, double-clicking a scene entry on the SCENES track brings the Properties tab to the forefront with the scene entry's fields ready to edit.
- In Pro Tools Integrated Mode, double-clicking a scene entry on the SCENES track opens the Edit Event window containing the same fields.
 {width=50%}
Scene Entry Fields
Scene Number - a text field containing the scene number, typically extracted from the EDL (for example, "18" or "18A"). Edit directly to change the number.
Scene Description - a text field containing a description of the scene, typically imported from a shooting script PDF or entered manually (for example, "INT. LIVING ROOM - NIGHT"). Edit directly to change the description.
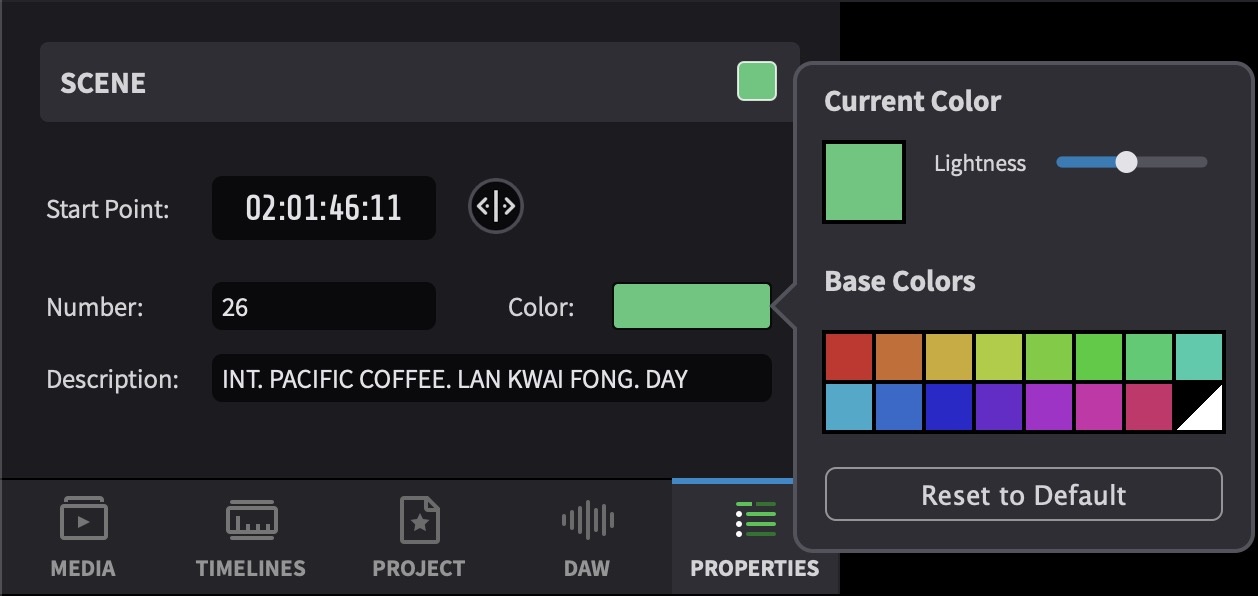
Colour - a per-entry colour used to visually distinguish scenes on the track. Clicking the colour swatch opens a colour picker from which a new colour can be selected.
Note: Each scene entry has its own independent colour - changing the colour of one entry does not affect other entries with the same scene number.
 {width=60%}
How Scene Information Appears on ADR Cues
ADR Cues inherit scene information automatically based on their timecode position. Each cue is assigned to the scene whose start point falls immediately before the cue's In Point on the timeline. When a cue is moved or a scene entry is repositioned, the scene assignments update automatically.
Scene information on ADR Cues is read-only - it cannot be edited directly on the cue. To change a cue's scene assignment, either move the cue to a different position on the timeline or adjust the scene entries on the SCENES track.
Event List
Each ADR Cue in the Event List displays its inherited scene information in a combined Scene column, showing the scene number and description together (for example, "18 - INT. LIVING ROOM - NIGHT"). This column is read-only and reflects whichever scene the cue falls within on the timeline. Scene entries themselves are not shown in the Event List - they are only visible on the SCENES track in the timeline.
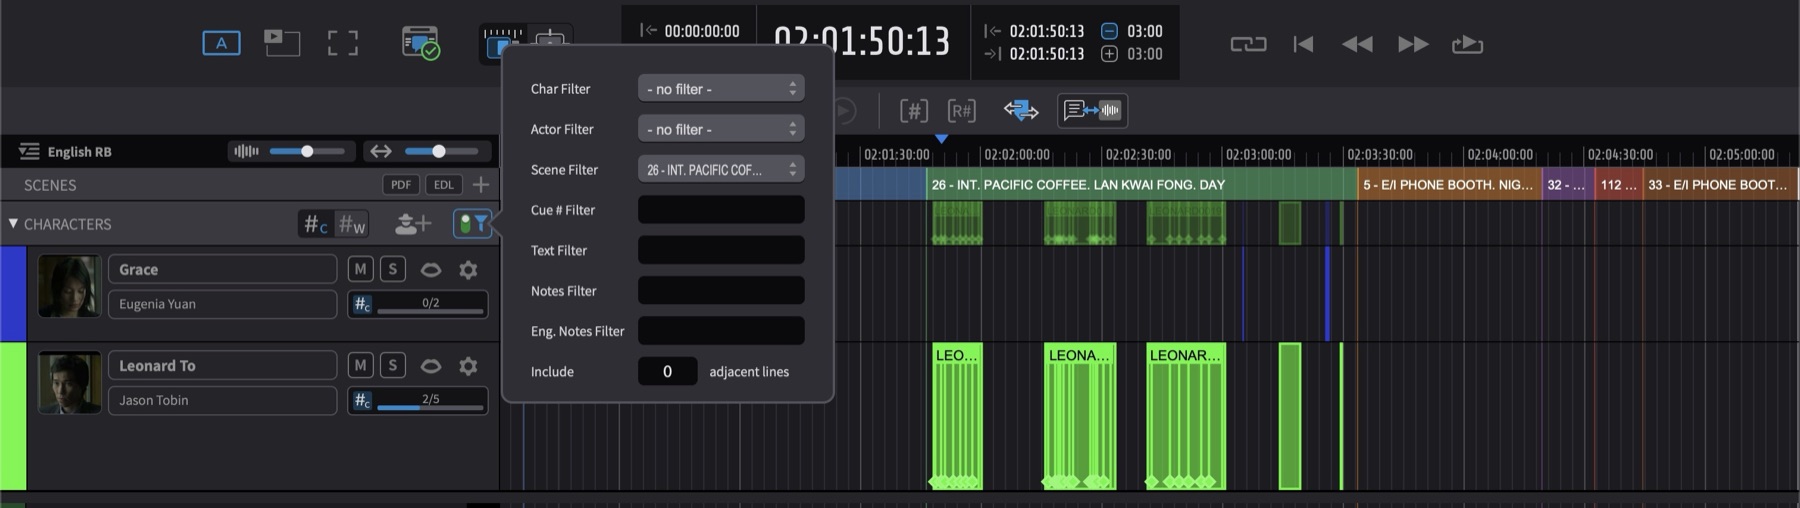
Scene Filter
The scene filter allows filtering ADR Cues to show only those within a specific scene. This is useful when working through cues scene by scene - for example, filtering to a single scene to focus on all dialogue within that location before moving on to the next.
The scene filter filters the ADR Cues, not the scene entries themselves.
 {width=100%}
Navigating with the SCENES Track
When hovering over a scene number on the SCENES track, the cursor switches to the grabber/hand tool. Clicking with the grabber tool selects the entire scene entry - from its start point up to the start of the next scene - highlighting its full range on the timeline.
In Timeline Range Mode, scene entries can be navigated on the timeline using the Tab key. Press Tab to move the playhead forward to the next event boundary, and Option & Tab to move backward. The playhead stops at each scene entry position, making it straightforward to navigate through scenes on the timeline.
Hold Shift while pressing Tab to make a timeline selection as the playhead advances, extending the selection from the current position to the next event boundary. Shift & Option & Tab extends the selection in the opposite direction.
Moving Scene Entries
Scene entries can be repositioned on the timeline by dragging. Hover over the scene number on the SCENES track until the cursor switches to the grabber/hand tool, then click and hold and drag the scene start to its new position. The video output updates in real time as the entry is dragged, so the exact scene start frame can be located visually before releasing the mouse. Releasing the mouse drops the entry at the new timecode and ADR Cue scene assignments update automatically.
Deleting Scene Entries
To delete a scene entry, select it and press Backspace.
Scene Information in Exports
Scene Number and Scene Description are included in all export formats: PDF, Word, CSV, and Excel cue sheets. The way scene data is presented differs between document-style and tabular formats.
PDF cue sheets display scene information as a labelled separator bar (for example, SCENE: 22 - INT. POLICE STATION/CID OFFICE - DAY) inserted above the first cue of each scene, giving directors and engineers immediate context for each group of cues that follows.
Word cue sheets include the same labelled separator bars above each scene's first cue, and additionally list all scene entries as standalone entries in the document - including scenes that contain no ADR cues - so the complete scene list from the SCENES track is preserved in the Word output.
CSV and Excel exports include scene entries as their own rows, identifiable by an Event Type of Scene. On a scene row, the Cue Number column holds the scene number, the Text column holds the scene description, and the Pre-roll Color column holds the entry's colour. ADR Cue rows in the same export do not carry the scene number or description as separate columns - the scene context for each cue is established by the position of the scene rows interleaved between the cue rows.
When importing a Word, CSV, or Excel cue sheet into a new
project, the scene data in the file is parsed and used to build
the SCENES track on the receiving timeline -
scene separator bars in Word documents and scene rows (Event Type
= Scene) in CSV and Excel files. PDF cue sheets are
an export-only format and cannot be reimported.
Note on TTAL: The TTAL format includes a
top-level scenes field at the schema level, but
Netflix's published reference samples leave this field empty and
the publicly available TTAL documentation does not define the
shape of scene entries. Cue Pro does not currently read from or
write to the TTAL scenes field, so SCENES track
data is not preserved across a TTAL round-trip. See the
How to use TTAL with Cue Pro chapter for the
full TTAL workflow.
[TODO: revisit once Netflix publishes a TTAL scene-field spec, or once Cue Pro adds read/write support for it.]