Operational Modes
Introduction
Cue Pro offers two distinct Operational Modes that determine how the application integrates with Pro Tools® and manages project data:
-
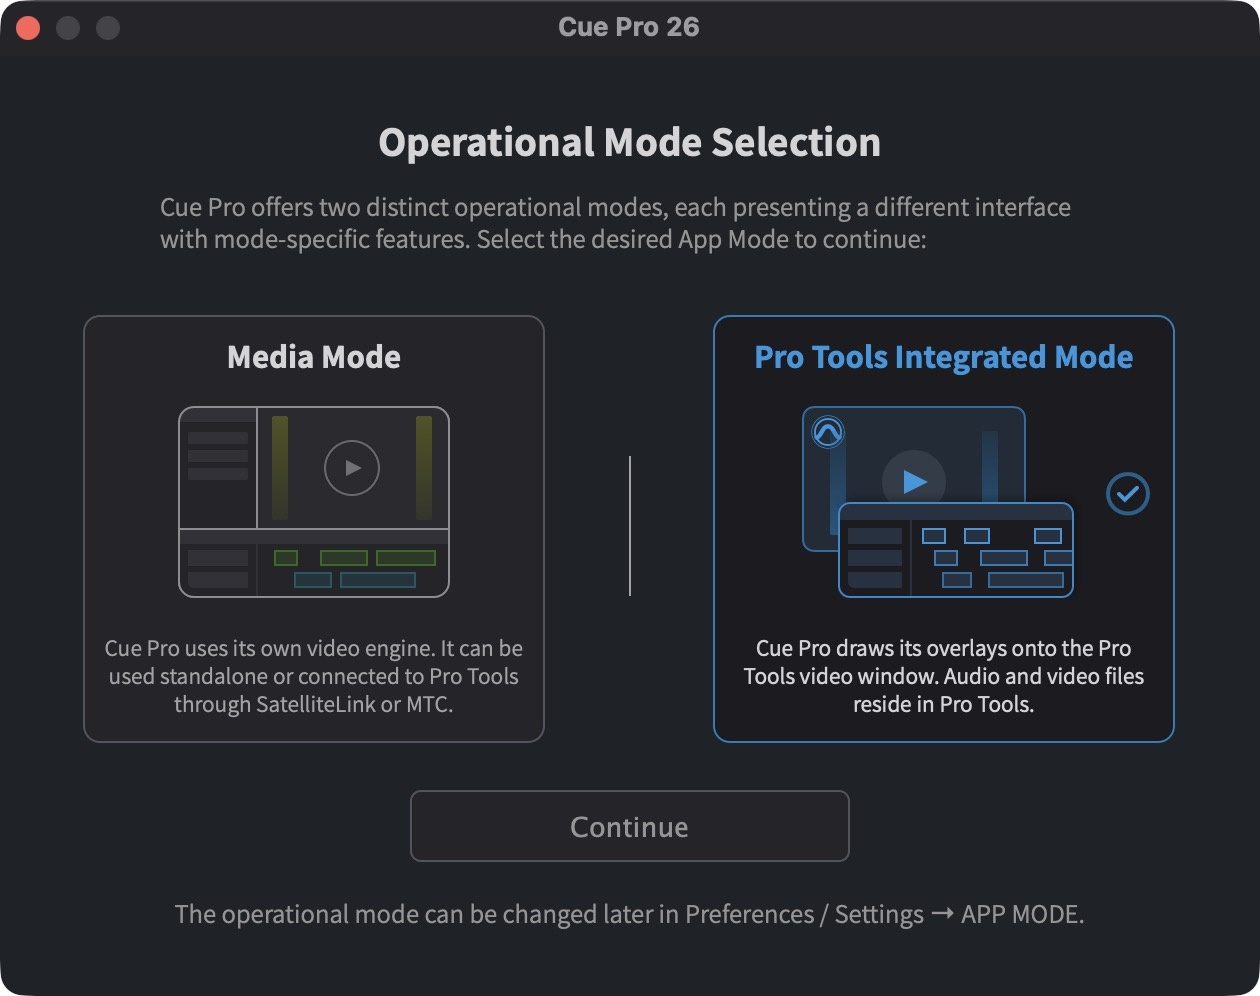
Pro Tools Integrated Mode - Cue Pro renders overlays live directly into the Pro Tools® video window. Audio and video files reside in Pro Tools®. All cue data is stored within the Pro Tools® session via the Cue Pro Connect plug-in, with no separate project files, or DAW Sync required. DAW Control is automatically enabled.
-
Media Mode - Cue Pro uses its own video and audio engines and manages separate project files on disk. The application can be used standalone or connected to Pro Tools® through Satellite Link or MTC for synchronized playback. DAW Control is available through macOS Accessibility integration.
Both product tiers (Cue Pro Edit and Cue Pro Studio) support both operational modes.
First Launch - Operational Mode Selection
When Cue Pro is launched for the very first time after installation, the Operational Mode Selection window appears, prompting selection of the preferred operational mode. This window will only appear once on initial launch and will never be shown again.
 {width=50%}
Select the desired mode by clicking on the corresponding card. The selected mode is highlighted in blue. The application will restart to apply the selected mode.
To change modes after initial setup, use the APP MODE tab in Preferences / Settings (see Switching Modes below).
Pro Tools Integrated Mode
Overview
Pro Tools Integrated Mode provides the most streamlined workflow for users working primarily within Pro Tools® sessions. In this mode, Cue Pro acts as an overlay system that renders visual event overlays live directly into the Pro Tools® video window, while all cue data is stored within the Pro Tools® session itself via the Cue Pro Connect plug-in.
This is by far the easiest method of syncing Cue Pro with Pro Tools® - beyond inserting the Cue Pro Connect plug-in, there is no further sync setup required.
Key Characteristics
- No separate project files - All cue data is stored directly within the Pro Tools® session via the Cue Pro Connect plug-in and saved by saving the Pro Tools® session
- Live integration - Changes made in Cue Pro are synchronized in real-time with the Cue Pro Connect plug-in
- Overlays on Pro Tools video - Visual event overlays (ADR cues, markers, timecode, etc.) are rendered live into the Avid Video Engine's (AVE) video output stream
- Session portability - Share sessions with other Cue Pro or ADR Master Studio users with just the Pro Tools® session file
When to Use
Pro Tools Integrated Mode is ideal for:
- Recording studios with Pro Tools® sessions and quick start scenarios requiring minimal setup
- When video is already in Pro Tools®
- Quick-start Pro Tools® connected cueing scenarios
- When no separate project save is required - all data stored in Pro Tools® session
- When multiple video displays with different overlays are not required
- When separate display offsets are not required for each video display
Applicable Chapters
The following chapters apply to Pro Tools Integrated Mode:
- Introduction (Chapter 01) - Product overview and operational modes
- UI Overview (Chapter 02) - Interface navigation (PT Integrated Mode interface: Controller Bar, Timeline Section, Event List, Import Script windows)
- Display Setup (Chapter 03) - Basic video display configuration (hardware video devices are Media Mode only)
- Project Creation and Use (Chapter 05) - Working with Cue Pro Connect plug-in, project saving within Pro Tools® sessions
- Timelines (Chapter 06) - Timeline creation and management (no Video/Audio tracks in PT Integrated Mode)
- Introduction to Overlays (Chapter 50) - Overlay basics
- Customising Overlays (Chapter 51) - Overlay settings and customization
- Visual Events Overview (Chapter 52) - Understanding visual events
- Adding and Editing Visual Events (Chapter 53) - Creating and modifying cues, markers, streamers
- Reconforming (Chapter 53a) - Picture change workflows with Matchbox 2
- MIDI Triggers (Chapter 54) - MIDI control and automation
- Logging Region Group ADR Cues within Pro Tools (Chapter 55) - Pro Tools® clip group workflows
- Bulk ADR Cue Import Overview (Chapter 56) - Overview of bulk import options
- Bulk ADR Cue Import (Chapter 57) - Importing from various sources (Pro Tools, EdiCue, Subtitle files, delimited text)
- Manual ADR Cue Import (Chapter 58) - Importing from dialogue lists and shooting scripts
- Exporting ADR Cues (Chapter 59) - Exporting cue sheets and data
- CueLink (Chapters 60b-60c) - Remote cue sheet access on network devices (features vary by product tier)
- Exporting Movies (Chapter 61) - Export procedures for Pro Tools Integrated Mode
- Keyboard Shortcuts (Chapter 62) - Keyboard shortcuts (mode-specific shortcuts noted)
- Using Elgato Stream Deck (Chapter 64) - Stream Deck integration
- Troubleshooting (Chapter 66) - Common issues and solutions
Chapters NOT applicable in Pro Tools Integrated Mode:
- Audio Setup (Chapter 04) - Audio is routed within Pro Tools®
- Video Tracks (Chapter 07) - Video is managed within Pro Tools®
- Audio Tracks (Chapter 08) - Audio is managed within Pro Tools®
- Spotting and Editing Video and Audio Files (Chapter 09) - Media editing occurs within Pro Tools®
- DAW Sync Overview and Setup Options (Chapters 10-14, 48) - Pro Tools® integration is handled by the Cue Pro Connect plug-in
- DAW Control and Accessibility API Setup (Chapter 49) - DAW Control is automatic in Pro Tools Integrated Mode
Media Mode
Overview
Media Mode provides a comprehensive standalone workflow with Cue Pro's own video and audio engines and separate project file management. This mode offers the most flexibility for users who need to work independently of Pro Tools®, or who require advanced video display configurations and full media import/export capabilities alongside Pro Tools®.
Key Characteristics
- Separate project files - Projects are saved as individual files on disk, independent of Pro Tools® sessions
- Built-in video engine - Cue Pro handles video playback and display independently
- Full media management - Import, edit, and export video and audio files within Cue Pro
- Advanced video playback modes - Multiple dual-frame playback modes including Side-By-Side, Splitscreen, and Picture-In-Picture for comparing picture versions or providing preview timing
- Multiple video displays - Configure multiple video outputs including internal displays (internal player, fullscreen, mini player) and compatible video hardware devices (Blackmagic, AJA, Avid). Cue Pro can access dual outputs on the same video hardware device (for example, both outputs on a Blackmagic or AJA card), with each output appearing as a separate display device. Each display can have different overlay settings and sync offsets (display delay compensation) applied independently
- DAW synchronization - Connect to Pro Tools® (or other DAWs) via Satellite Link, MTC, or MMC for synchronized playback and control
- Flexible workflows - Work standalone or synchronized with external DAWs
When to Use
Media Mode is ideal for:
- ADR Master 3 users seeking familiar interface and workflow
- Standalone work without Pro Tools® (for example when cueing ADR)
- When using DAW Sync with Satellite Link or MTC for synchronized playback with Pro Tools® or other DAWs
- When needing full media import/export capabilities
- When multiple video displays with different overlays are required (for example for recording scenarios)
- When separate display offsets are required for each video display (for example for recording scenarios)
- When separate project files are needed (independent of Pro Tools® sessions)
- Advanced video display configurations requiring per-device settings (for example for recording scenarios)
Applicable Chapters
All chapters in this manual are applicable to Media Mode. Where chapters are relevant to both operational modes, mode-specific differences are noted within those chapters.
Cue Pro Connect Integration
In Media Mode, cues can be loaded from the Cue Pro Connect plug-in in a similar manner to opening a Cue Pro project. This "load once, save back" workflow is primarily used for recording scenarios, allowing Cue Pro cues created in Pro Tools® sessions to be loaded in Media Mode and then exported back after recording. This is not a live integration - cues are loaded as a snapshot and must be manually exported to update the Pro Tools® session once recording is complete. This allows the updated cue information, including recording status and 'as-recorded' changes, to be shared back with the dialogue editor, ADR editor, or supervisor via the same Pro Tools® session containing the ADR recordings.
For details on this workflow, see the Project Creation and Use chapter (Chapter 05).
Switching Operational Modes
Switching modes requires restarting Cue Pro, so any unsaved changes should be saved first before proceeding.
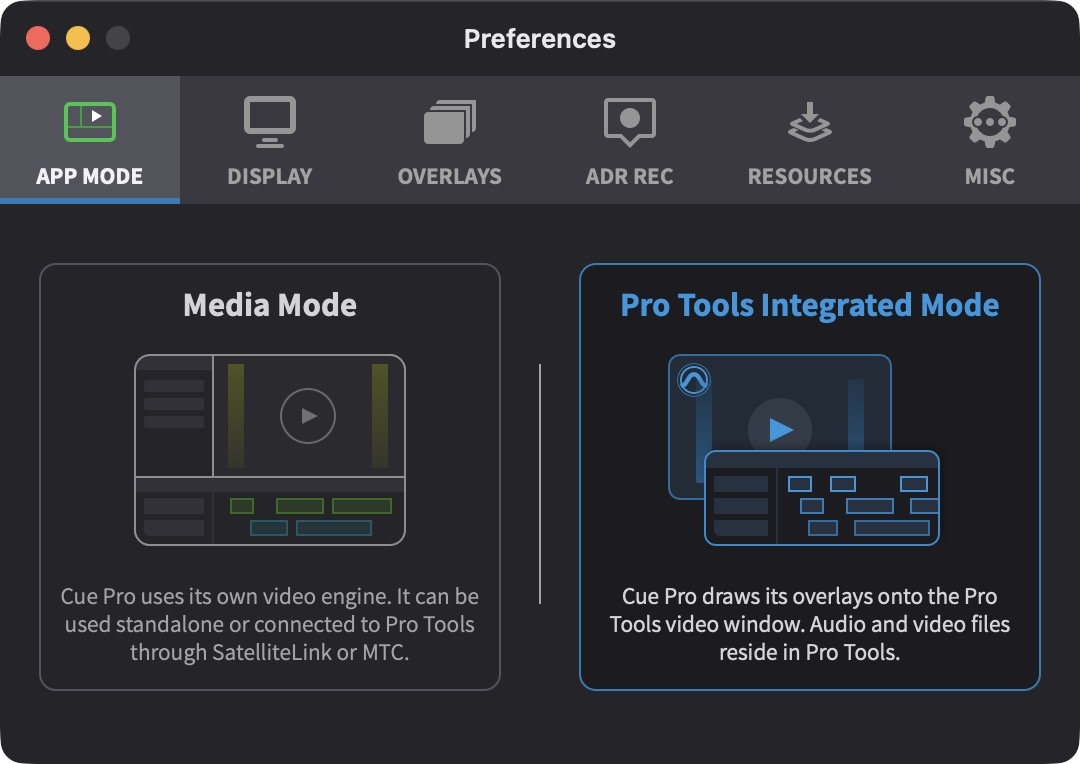
To switch operational modes, open Preferences / Settings from the Cue Pro menu (or Shift & ,) and click on the APP MODE tab.
Two mode cards are displayed side by side: Media Mode and Pro Tools Integrated Mode. Click on the desired mode card to select it. The selected mode is highlighted in blue. The application will prompt for a restart to apply the mode change.
 {width=60%}
Project Saving Behavior
Pro Tools Integrated Mode
In Pro Tools Integrated Mode, all cue data is stored within the Cue Pro Connect plug-in within the Pro Tools® session. To save the Cue Pro project, simply save the Pro Tools® session. There is no separate Cue Pro project file to manage.
The cues can also be saved or exported / shared by saving the Cue Pro Connect plug-in setting in Pro Tools®.
For detailed information on project saving and loading in Pro Tools Integrated Mode, see the Project Creation and Use chapter (Chapter 05).
Media Mode
In Media Mode, Cue Pro projects are saved as separate files on disk. Use File → Save Project (or Command & S) to save the project file.
For detailed information on project creation, saving, and loading in Media Mode, see the Project Creation and Use chapter (Chapter 05).