Timecode Overlays
Introduction to Overlays
Overlays are graphical elements rendered into the video output that provide visual information during sound post-production sessions. Video Sync offers several overlay types, each serving a different purpose:
- Timecode - displays the current timeline position
- Markers - annotate and identify sections of a project
- Streamers - provide visual countdowns to sync points
- Flutters - mark Hit Points and tempo with flashing visual cues
This chapter covers the Timecode overlay - how to enable, configure, and position it.
Timecode Overlays
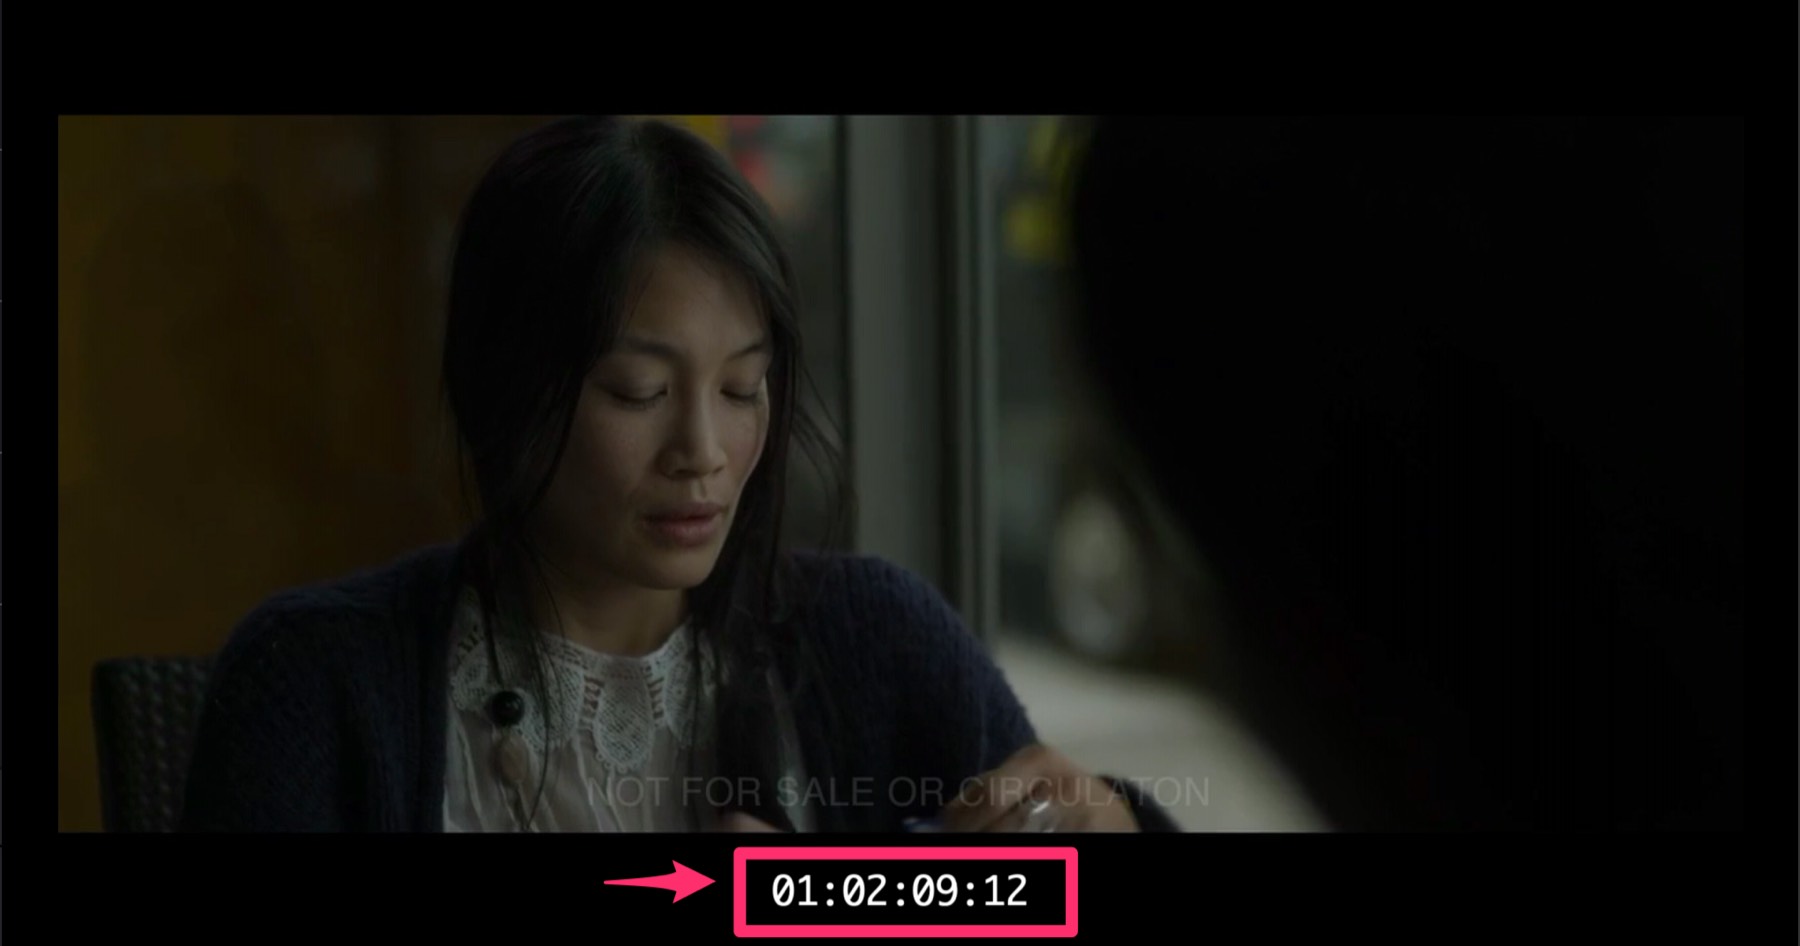
The Timecode overlay displays the current timeline position at the playhead in either Timecode (hours:minutes:seconds:frames) or Feet+Frames format.
The Timecode Overlay appears directly on the video output as a text readout. Unlike other overlay types, timecode is not event-based and does not appear on a Visual Events track - it remains visible at all times when enabled.
Timecode Overlays provide a real-time positional reference for composers, music editors, and other post-production professionals working to picture. Common use cases include verifying sync alignment during playback, confirming frame-accurate positioning when spotting, and providing a visible timecode reference on external monitors for supervisors or collaborators.
 {width=80%}
Note: Overlays are enabled by default. If the Timecode Overlay is not visible during playback, see Enabling Timecode Overlays later in this chapter.
Switching Between Timecode and Feet+Frames
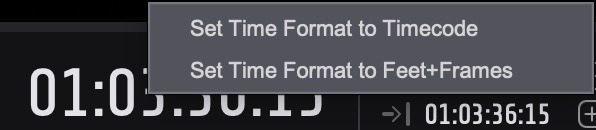
To switch between Timecode and Feet+Frames display, right-click the main counter when it is not highlighted. Select either Set Time Format to Timecode or Set Time Format to Feet+Frames. This changes the display format of the Timelines, counters, and the Timecode overlay simultaneously.
 {width=60%}
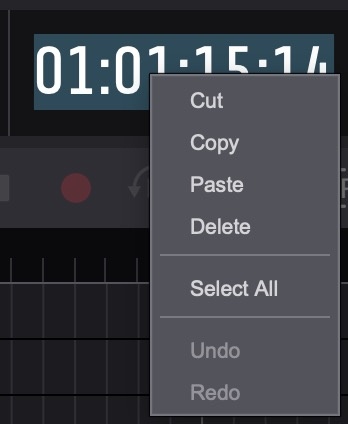
To copy and paste timecode values, double-click the counter to highlight it, then right-click to access a context menu with Cut, Copy, Paste, Delete, Select All, Undo, and Redo. This context menu is available on all timecode fields throughout the application - including the main counter, selection in/out counters, and timecode fields in the Properties tab and Event List. It allows timecodes to be copied from external sources - such as a DAW, spreadsheet, or email - and pasted directly into the field, or copied from Video Sync and pasted elsewhere. Note that when the counter text is highlighted, right-clicking will show this context menu instead of the format switch menu described above.
 {width=60%}
Playback Modes
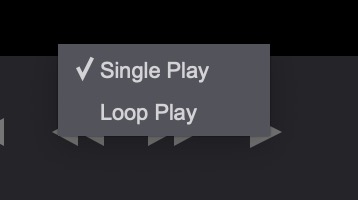
Hold down the Control key while clicking the play button to choose between Single Play and Loop Play modes.
 {width=40%}
Enabling Timecode Overlays
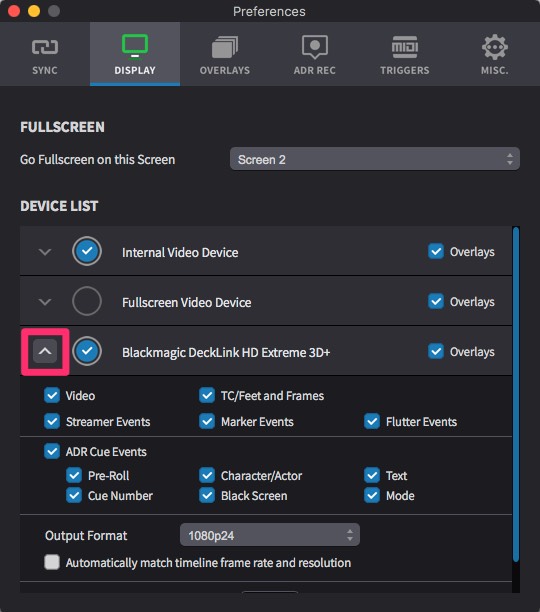
The Device List in Preferences / Settings → DISPLAY tab shows all available video output devices - including video hardware, the Fullscreen Video Device, and the Internal Video Device - each with independent overlay controls. Click on the left-most grey arrow of the relevant video device to show the expanded settings, so that the arrow is pointing up.
Each device can independently show or hide the Timecode Overlay using the TC/Feet+Frames checkbox. The Overlays checkbox on each device toggles all overlay types on or off for that device. This allows flexibility when setting up multiple outputs - for example, a timecode readout can be visible on the main editing display while a director's monitor shows only the clean video.
 {width=70%}
Global Toggle Shortcuts
To toggle the Timecode Overlay independently across all devices, press Command & T, or select Toggle Time Overlay from the View menu. To toggle all overlays across all devices globally, press Shift & Command & B, or select Toggle Overlays Globally from the View menu.
Timecode Settings
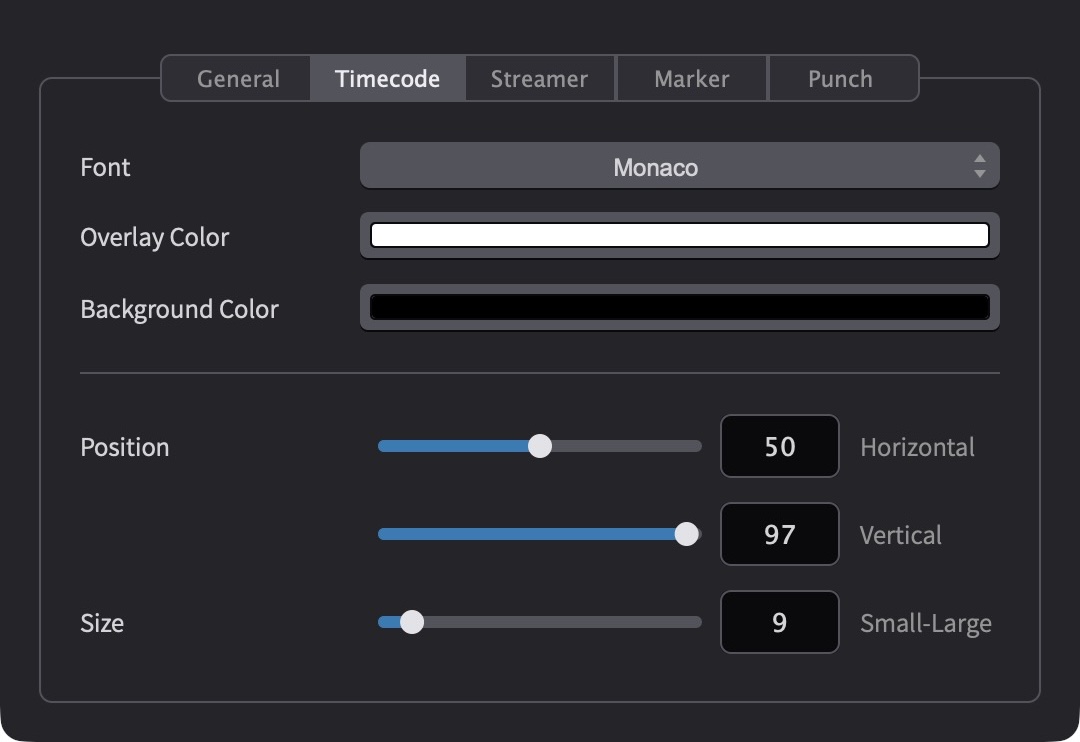
All Timecode Overlay settings are configured in Preferences / Settings → OVERLAYS → Timecode tab. The available options provide complete control over how the timecode display appears on screen.
 {width=60%}
When a setting is adjusted, a temporary preview of the overlay is automatically displayed on all available video devices for a few seconds, allowing settings to be fine-tuned visually. Overlays do not need to be enabled in the Device List, and events do not need to be added to the timeline, in order to preview settings changes.
If overlays are visible when adjusting settings but not during playback, ensure that the overlay type is enabled for the relevant device in the Device List (Preferences / Settings → DISPLAY tab), and that overlays have not been disabled globally via Toggle Overlays Globally in the View menu.
Overlay appearance settings apply globally - they are shared across all video devices, projects, and timelines.
The font and overlay colour of the timecode readout can be configured here.
Video Sync can optionally display a background underneath the timecode. A colour is chosen from the Base Colors palette and adjusted using the Lightness slider. To remove the background completely, drag the Opacity slider to 0%.
Position adjustments allow precise placement of the timecode readout on screen. The Position: Horizontal slider moves the readout left or right across the display. The Position: Vertical slider adjusts the vertical placement - moving left positions the readout lower on screen, while moving right positions it higher.
The Size slider controls how big or small the Timecode Overlay appears on screen.
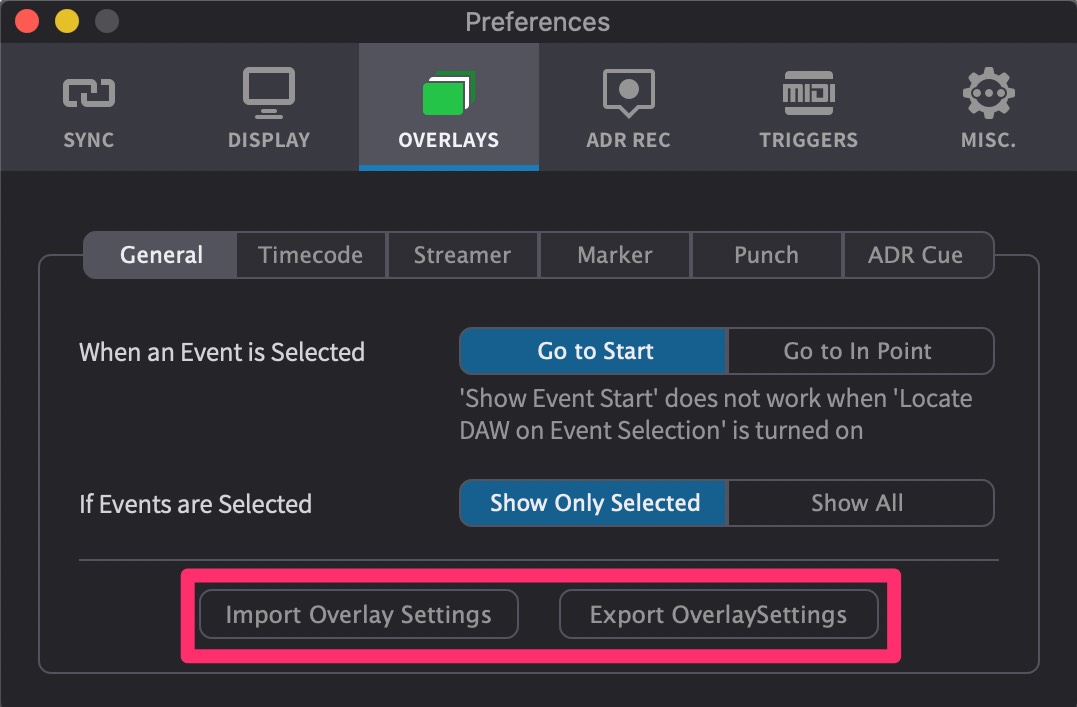
Importing and Exporting Overlay Settings
Overlay settings can be saved and loaded using the Export Settings and Import Settings buttons in the General settings page. This allows studios to save unique overlay configurations for recurring projects, share settings with other studios or editors, and manage multiple user profiles with different default settings.
 {width=70%}