Exporting ADR Cues from ADR Master
It is possible to export ADR Cue Events from ADR Master to the following text formats for ADR Cue sheets, or for import into other platforms:
.pdf: ADR Cue Sheets & ADR Overview
Chart
.asc or .txt: Scheduling
File
.xlsx: Excel File
.csv: Comma Separated Values
.ttal: Netflix TTAL
To export only the ADR cues of a selected character, set the filter to that character in either the Timeline, Event List, or DAW Control window.
To export all characters, clear any filter in the Visual Event track - so that all the ADR Cues are showing.
If required, make a selection to export only selected events or a specific reel for example.
Select the relevent sort field in the Event List that the cues should be exported in order of.
Next choose the relevant export type in the File → Export menu.
Export ADR Overview Sheet
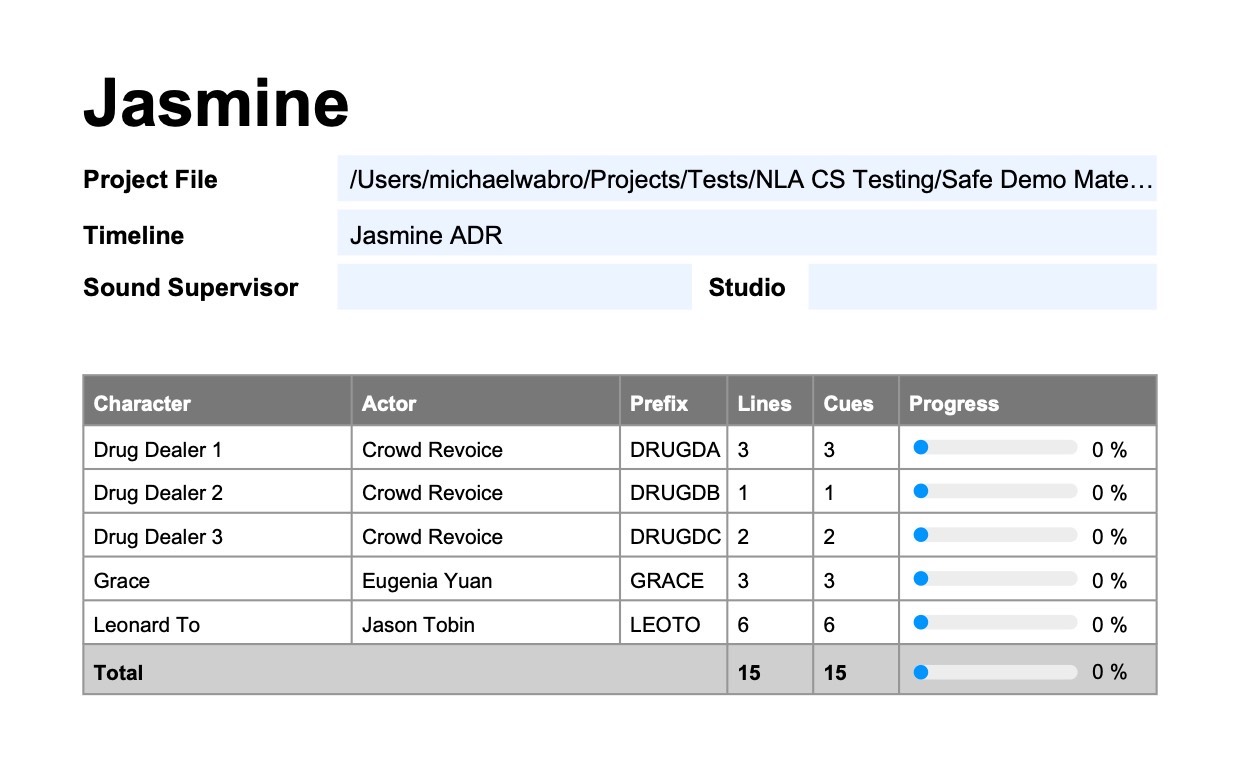
This very simple export option shows a summary of all the ADR lines for all characters - both recorded, and to be recorded. This is particularly useful for Post Production Supervisors needing to schedule & book actors and ADR studios. It shows character, Actor, Prefix, number of lines, number of cues & the recording progress.
There is no export settings window for this export option.
Here is a an example of an ADR Overview file:
 {width=70%}
Export Scheduling File
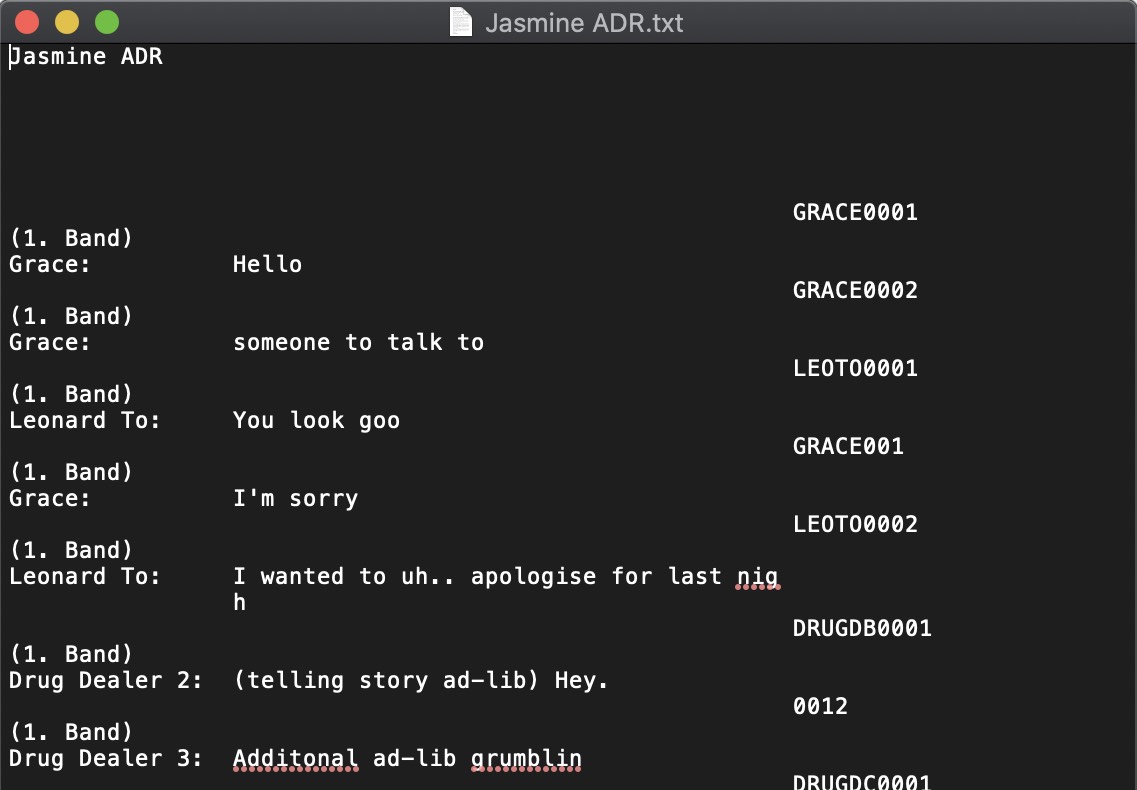
This export option gives a basic text overview of the lines to be recorded for used specifically with Arendis & Sesam ADR studio booking systems.
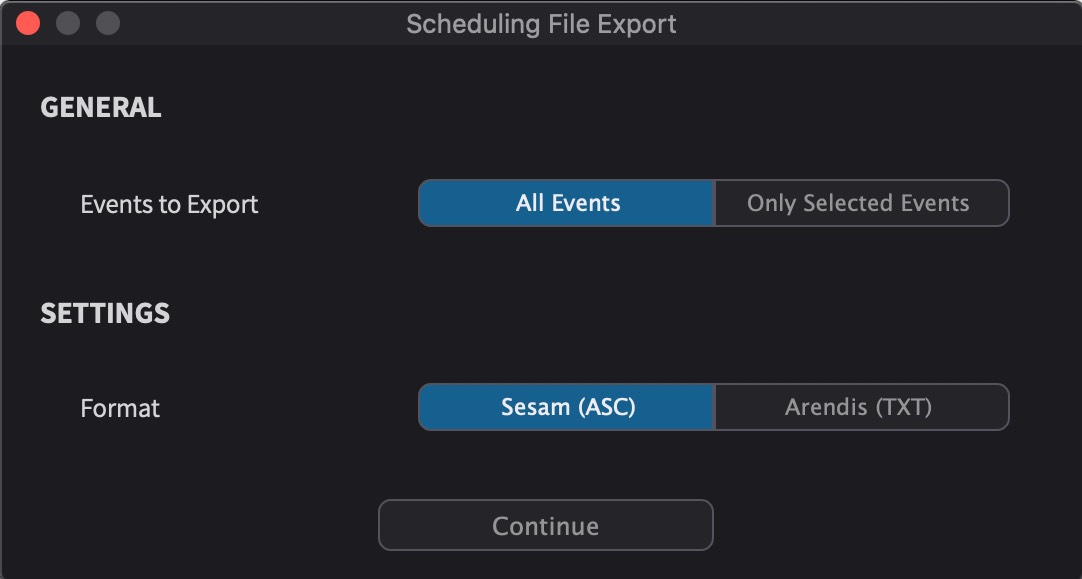
This brings up the Scheduling Export window, which is divided into two sections, General & Settings.
 {width=70%}
The General section has one option: Events to Export (All Events / Only Selected Events) - Selects whether only the selected ADR Cues are exported, or all.
The Settings section has one Format option- which sets the formatting of the Scheduling file between Sesam(ASC) & Arendis(TXT).
Here is an example of a Scheduling File:
 {width=80%}
Batch Export Events
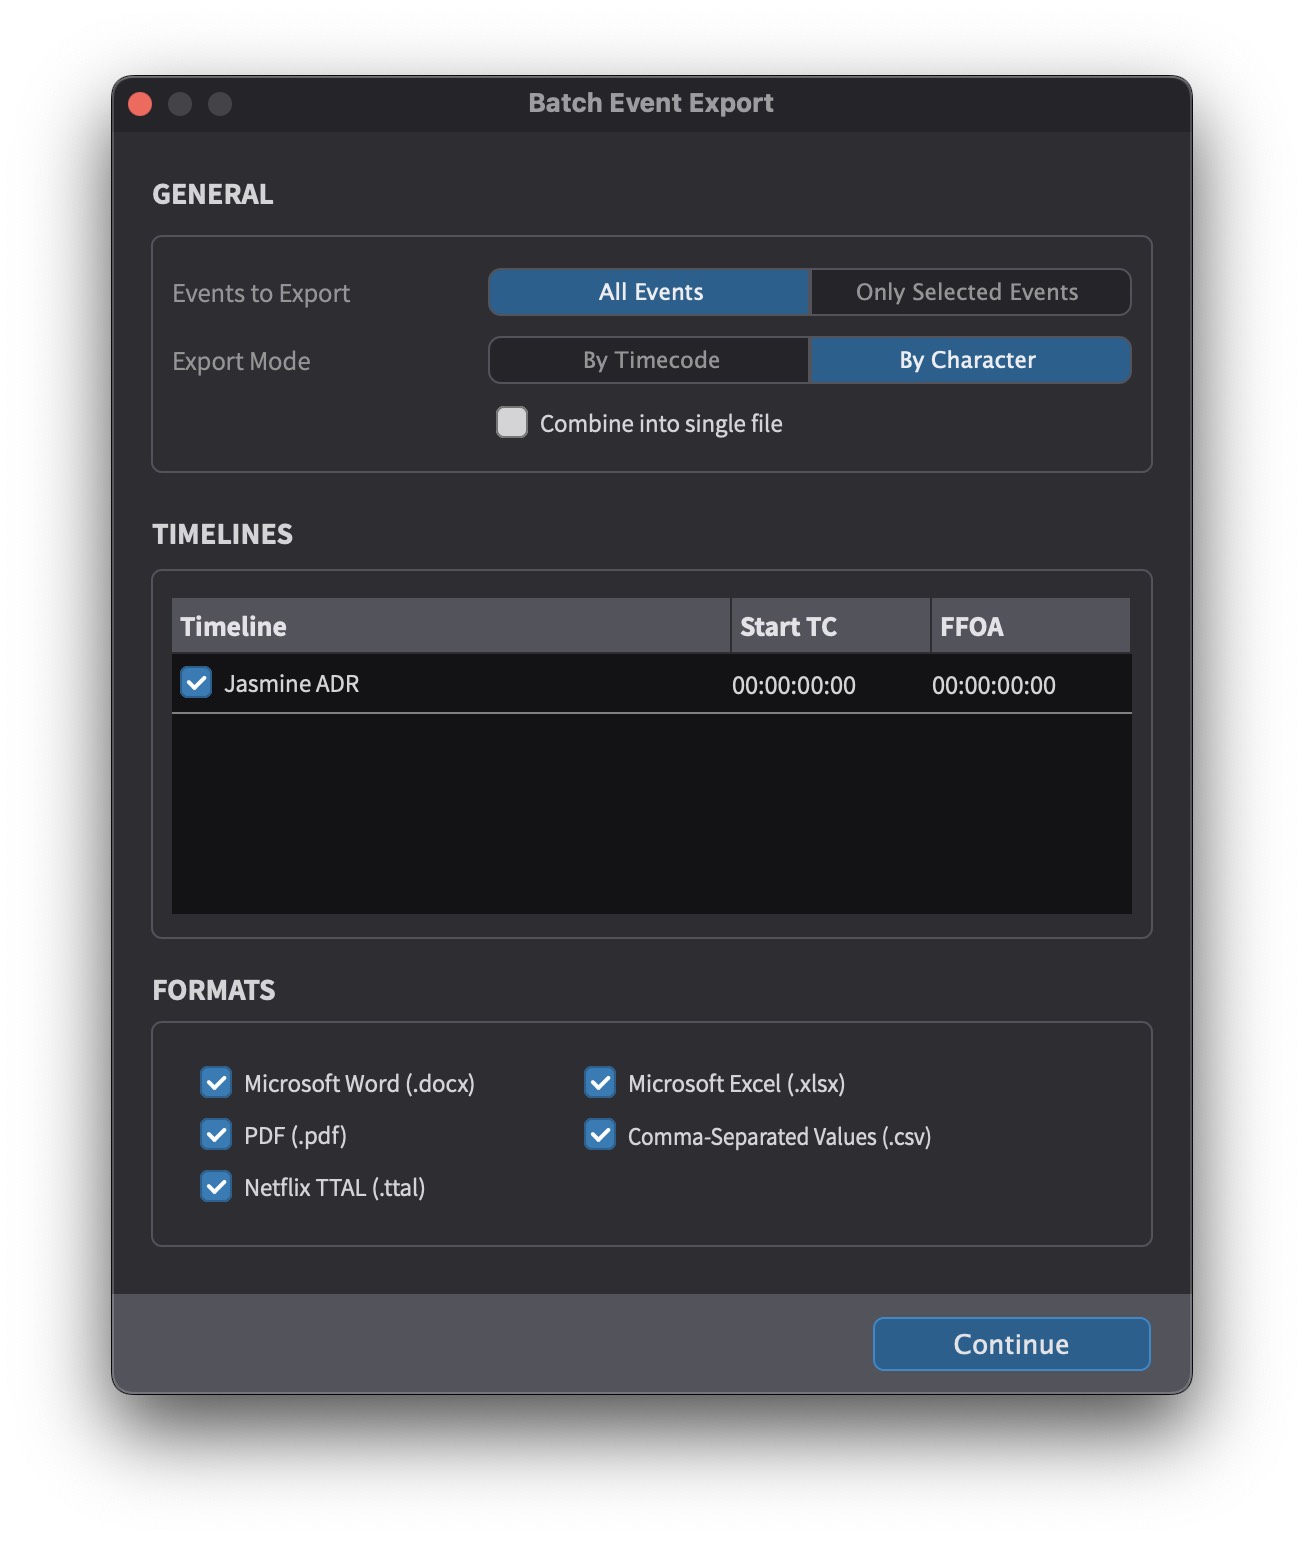
Use this option to export Microsoft Word (.docx), PDF ADR Cue Sheets (.pdf), Netflix TTAL (.ttal), Microsoft Excel (.xlsx) & Comma-Separated Values (.csv) files.
These formats can all be exported in one go, or selected one at time in the FORMATS section of the Batch Event Export window.
 {width=55%}
The Batch Event Export window consists of 2 pages. The first page is divided into three sections consisting of GENERAL, TIMELINES & FORMATS.
The GENERAL section sets which events are exported and how they are exported.
Events To Export (All Events / Only Selected Events) - Selects between exporting all events; or only the selected events.
Export Mode (By Timecode / By Character) - selects whether the character ADR cues are inter-mingled & sorted by the their timeline order; or whether on a per character basis (in timeline order).
Combine into single file - joins the sheets from all characters into one PDF file.
This can be desirable when printing a PDF for all characters in one go.
The TIMELINES section defines which Timelines should be exported.
Enable the check-boxes next to names of the relevant Timelines in your project.
The FORMATS section defines which format files should be exported.
Microsoft Word (.docx) ADR Cue Sheet style layout for easy editing during translation and adaptation with one-click transparent bulk re-import into the Event List.
PDF (.pdf) - ADR Cue Sheets for use during ADR Recording Sessions.
Netflix TTAL (.ttal) - created specifically for use by Netflix's unique TTAL system for foreign versioning. FFOA & Language settings are derived from the Timeline settings.
To create a new language version, duplicate the Timeline & set a different language. This will be exported into the TTAL file tag on export. This way, Netflix do not need to rely on the file naming to know which language the file contains.
Microsoft Excel (.xlsx) - all the cues listed in a table format - including the text formatting from the event's text and notes (bold, italic, underlined, strikethrough, text color). Reason code fields are also included.
 {width=70%}
Comma Separated Values (.csv) - all the cues listed in a basic table format.
.csv format is a good choice for export to other database programs like EdiCue.
 {width=70%}
Enable the check-boxes next to the required file formats.
Once complete, click the Continue button.
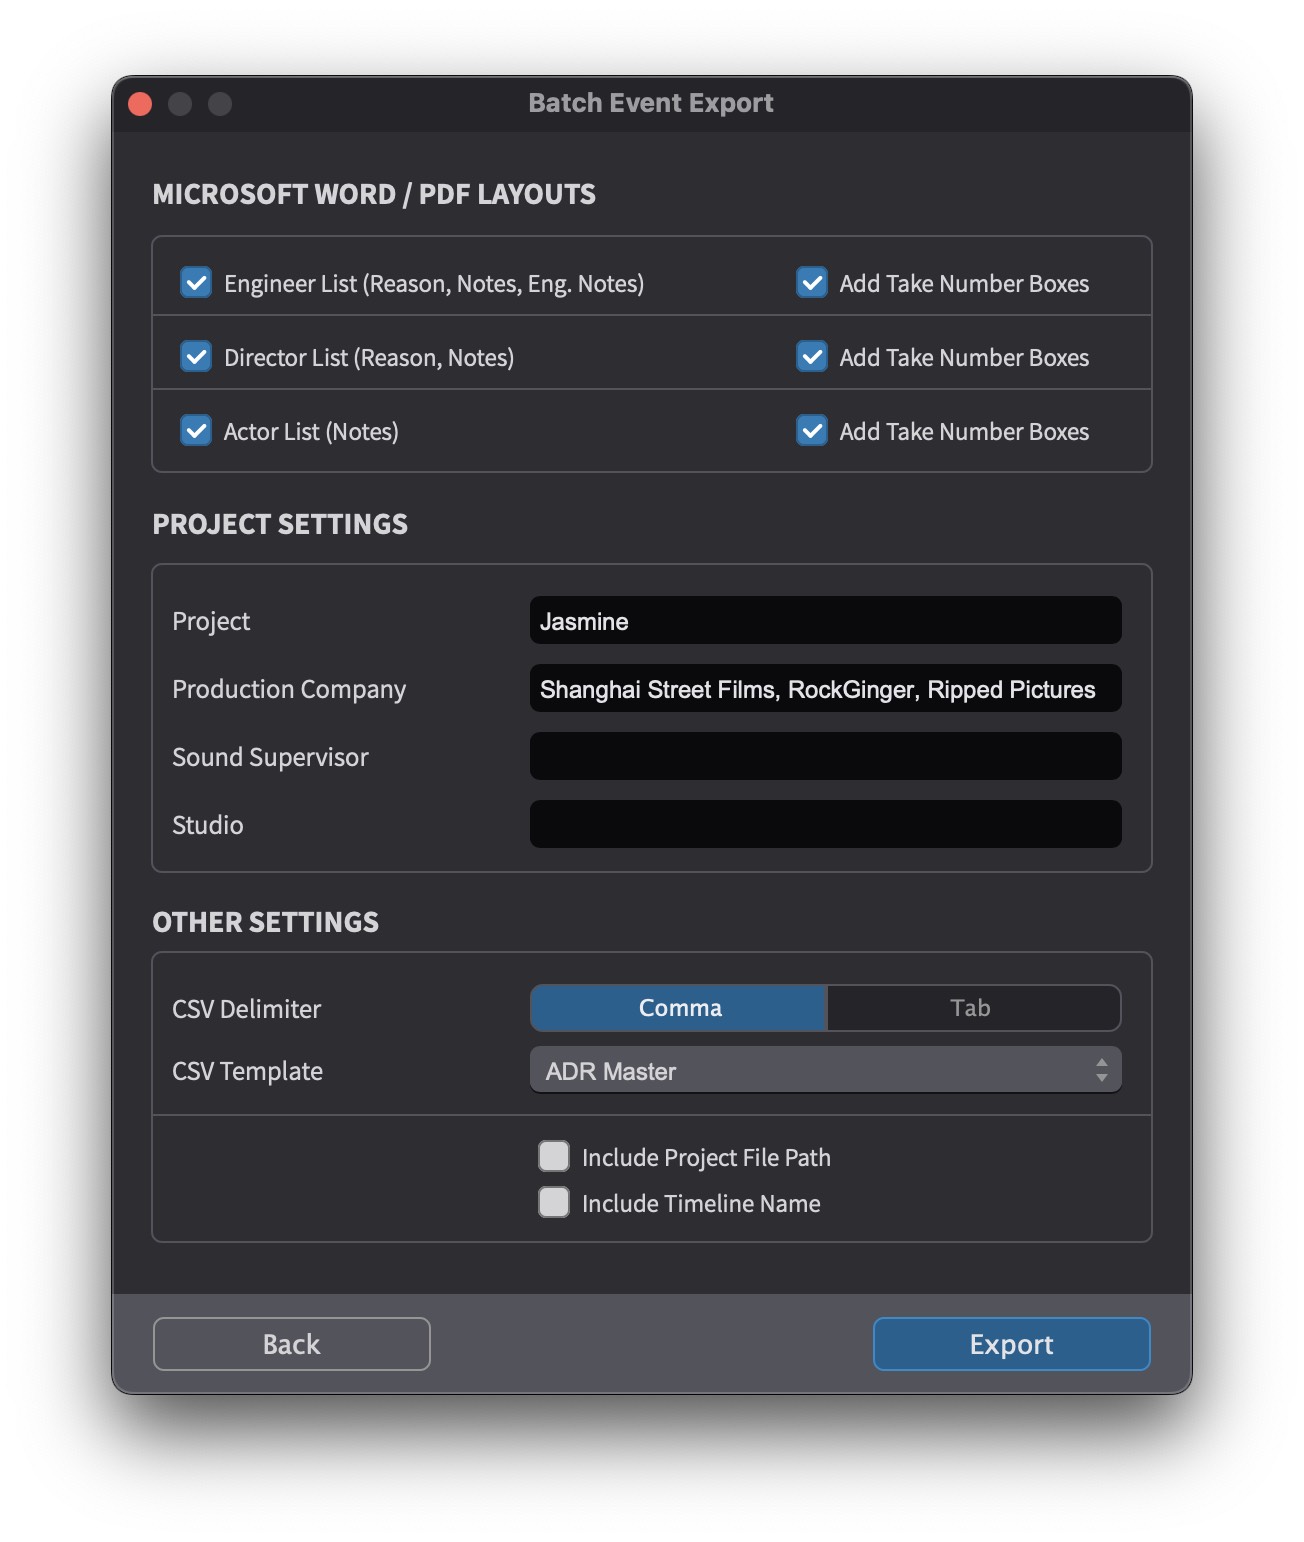
The second page is divided into three sections consisting of MICROSOFT WORD / PDF LAYOUTS, PROJECT SETTINGS & OTHER SETTINGS.
 {width=70%}
The MICROSOFT WORD / PDF LAYOUTS section defines which ADR Cue sheets layouts to export.
ADR Master offers three different types of PDF Layouts for Engineer, Director & Actor - with differing amounts of information displayed relevant to each. Enable the check-boxes to the left of each required list type.
Enable the check-boxes to the left of Add Take Number Boxes to choose whether the Take number boxes are added to each enabled List type - which allow notes to be made during the recording process about preferred takes.
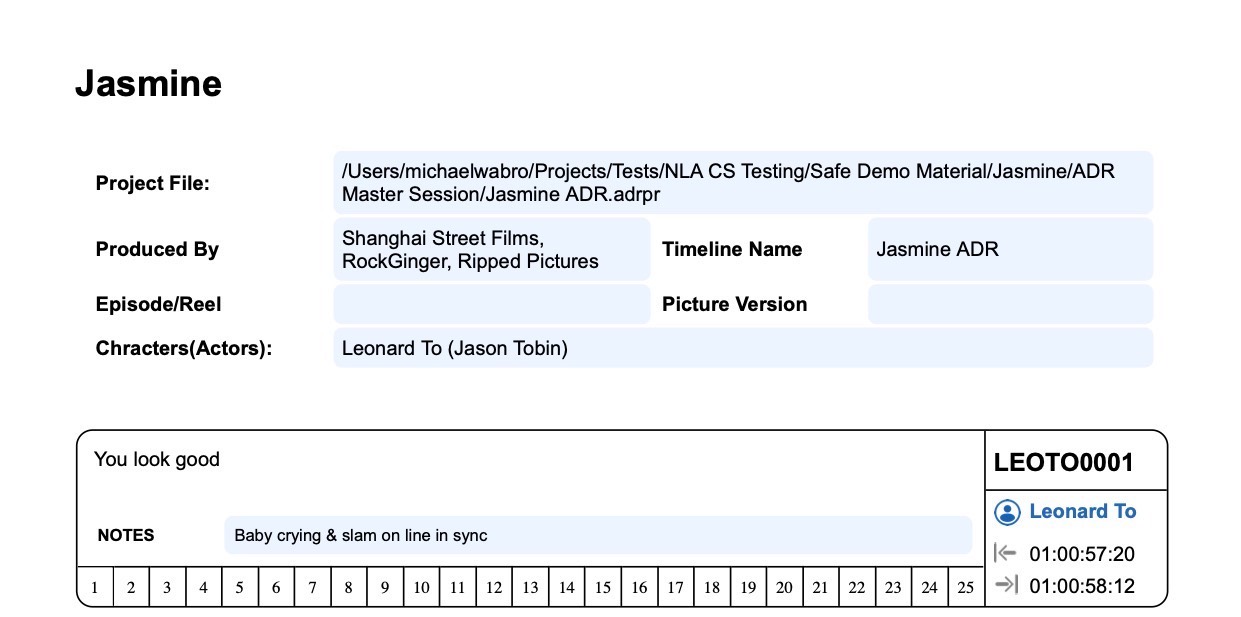
Only enable Take Number Boxes where necessary, as this increases the amount of space required for each ADR Cue & therefore increases the number of total pages required for print. In most cases, unless the director would also like to circle takes, this is usually only needed for the attending Dialogue Editor / Supervisor via the Engineer Lists.
Here is an example of an Engineer layout:
 {width=70%}
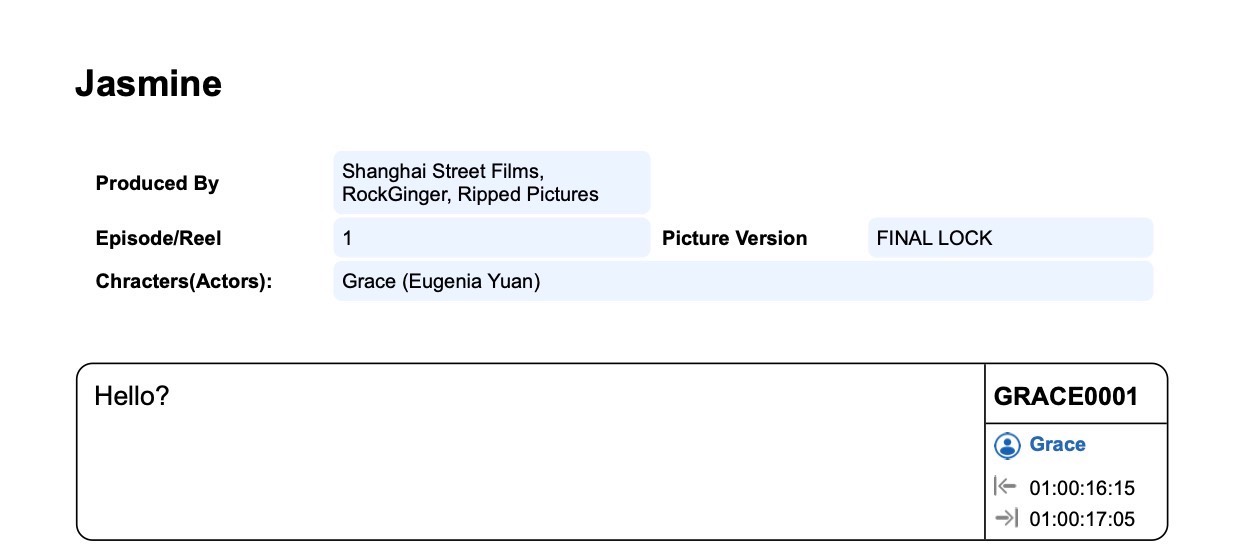
Here is an example of the more simplified Director layout:
 {width=70%}
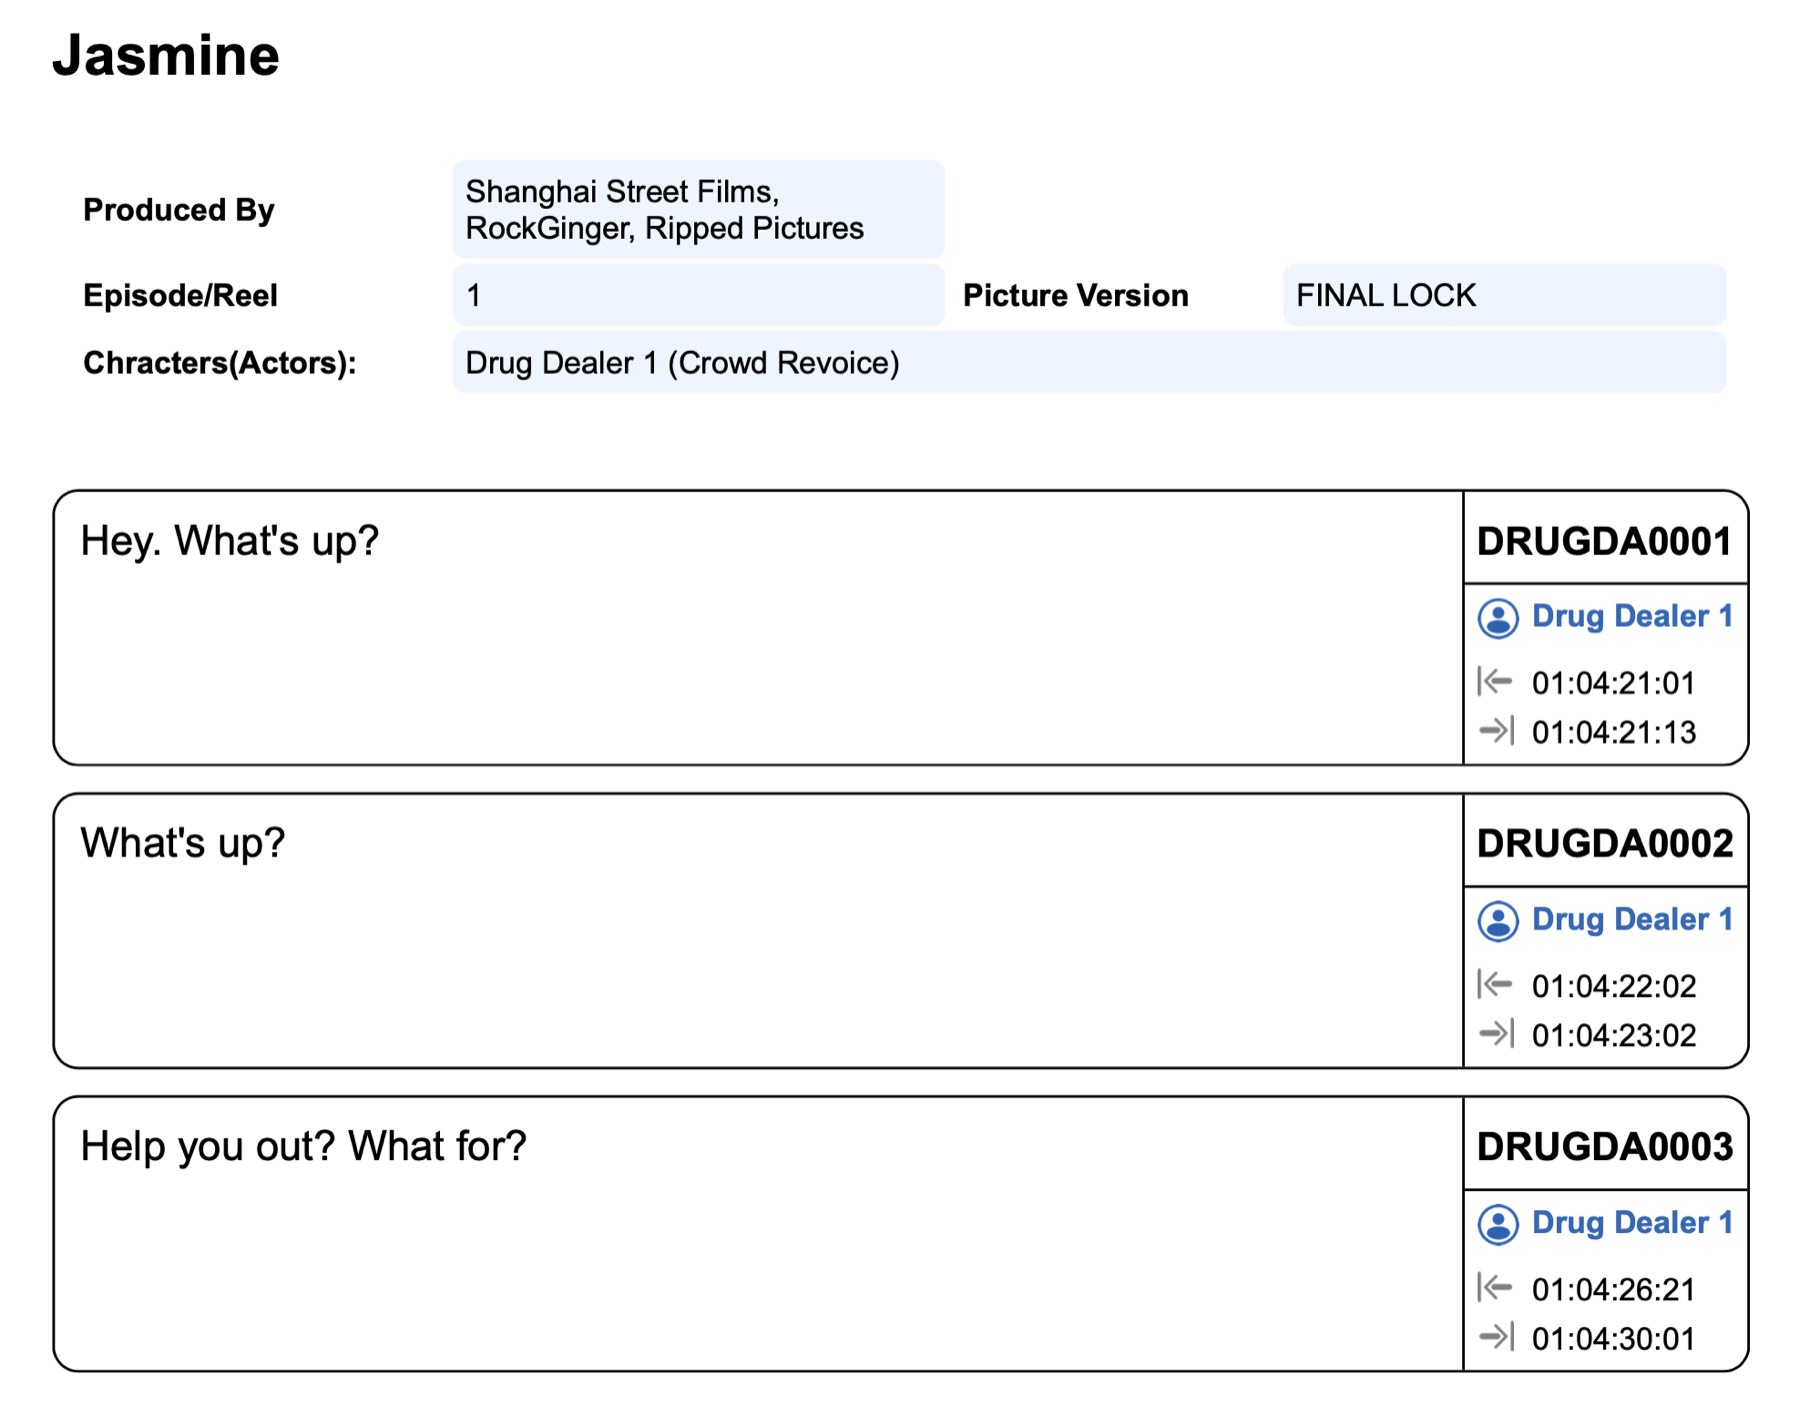
Here is an example of the even more simplified Actor layout:
 {width=70%}{width=70%}
The PROJECT SETTINGS section allows for additional Production information to be entered, such as the name of the Project, Production Company, Sound Supervisor & Recording Studio.
The OTHER SETTINGS section sets the CSV formatting & which additional Project info to include.
CSV Delimiter (Comma / Tab) - Defines whether the column items in each line are separated by commas or tabs.
CSV Template (ADR Master / DS ADR) - Defines whether the columns are labelled in a manner that ADR Master would be able to auto-map on input, or whether they should be formatted for import into the DS ADR recording system.
If desired, Include Project File Path & Include Timeline Name can be enabled so that this information appears on the exports.
Click the Export button.
In the Set Export Path window that appears
next, navigate to where the files should be saved.
Enter a name for the file in the
Save As: field.
All exported files will be given this name suffix.
Click the Save button.
The progress bar appears and starts the export process.
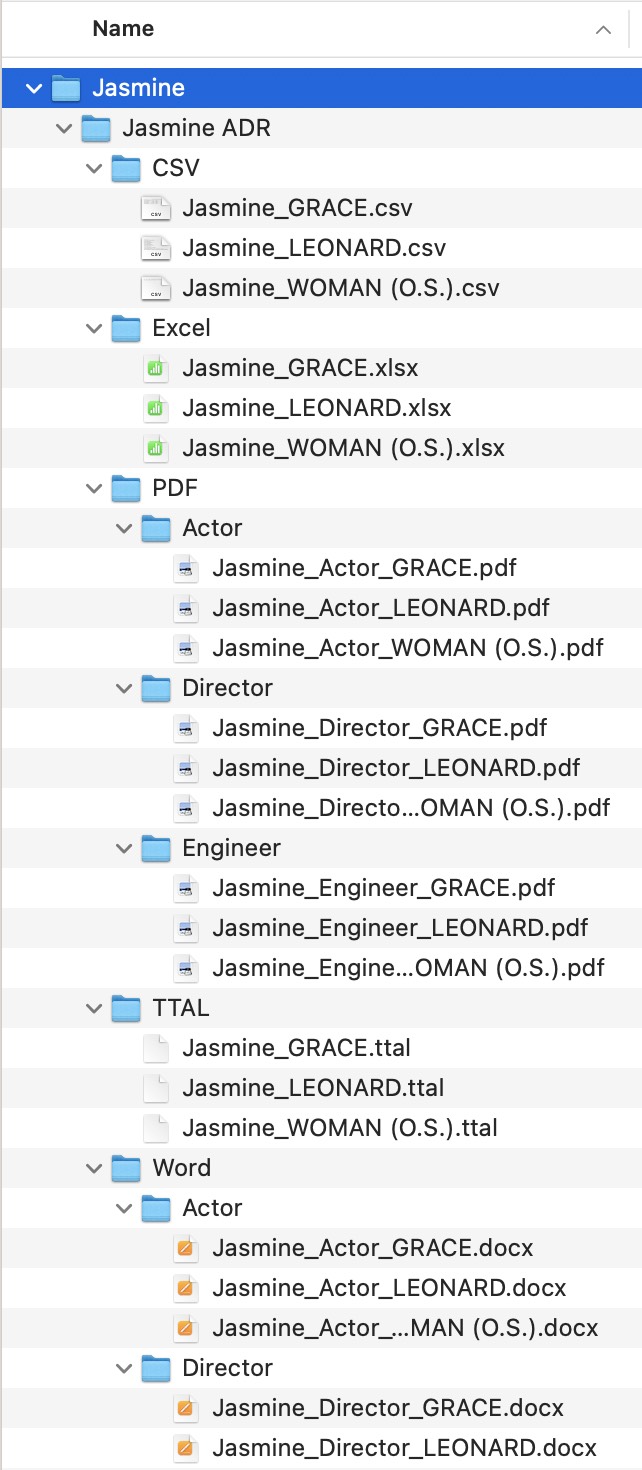
Once the progress bar is complete, a folder will appear in the chosen destination, containing all the chosen files.
 {width=40%}
